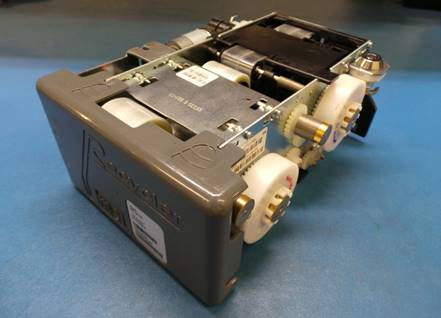
674793001/674793001C
|
|
|
TÉCNICOS / TECHNICIANS
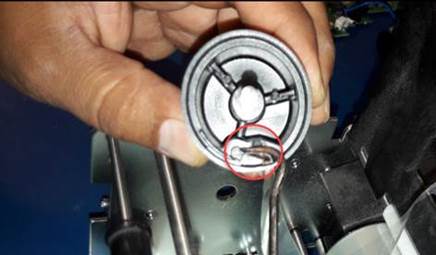
Nota: si el reciclador llega vencido y muy dañado se hace escrap, no olvidando tomar foto, pero si se ve de manera que se le pueda dar mantenimiento o reparación proceda con el proceso normal.
Note: if the recycler arrives expired and very damaged, it is scraped, not forgetting to take a photo, but if it is seen in such a way that it can be maintained or repaired, proceed with the normal process.
Sacar la unidad de su empaque e introducir la información del Tracking # en la página de AMCOR.
Take the unit out of its package and enter the Tracking # information on the AMCOR page.
|
|
|
|
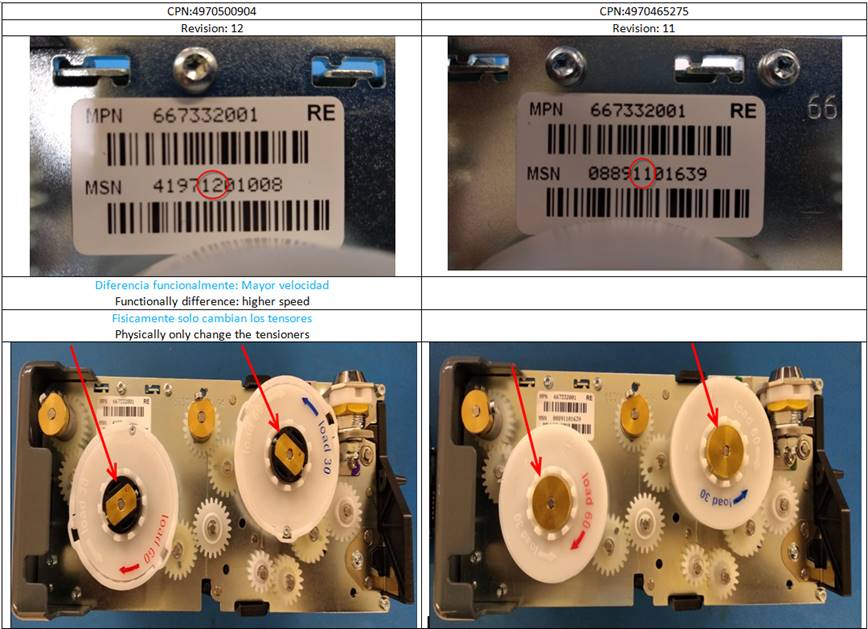
NOTA: Los recicladores con el CPN: 4970500904 son Rev. 12, recuerde que la revisión se revisa en el 5to y 6to digito del (MSN) que viene en la etiqueta en el lado derecho.
NOTE: Recyclers with CPN: 4970500904 are Rev. 12, remember that the revision is the 5th and 6th digit of the (MSN) that comes on the label on the right side.
Los recicladores con el CPN: 4970465275 son para revisiones anteriores, ejemplo: Rev. 11.
Recyclers with CPN: 4970465275 are for previous revisions, example: Rev. 11.
Diferencias de un reciclador CPN: 4970500904 y un reciclador CPN: 4970465275, son los tensores del mylar tape y la revisión.
Differences of a recycler CPN: 4970500904 and a recycler CPN: 4970465275, are the mylar tape tensioners and the revision.
PRE-PRUEBA Y REVISIÓN VISUAL / PRE-TEST AND VISUAL REVIEW
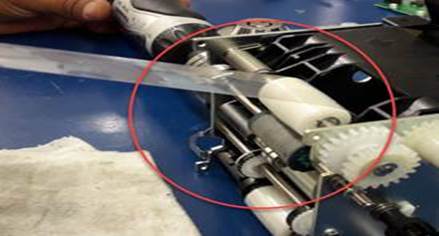
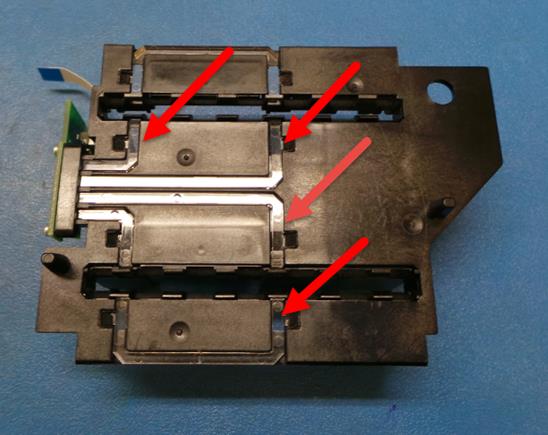
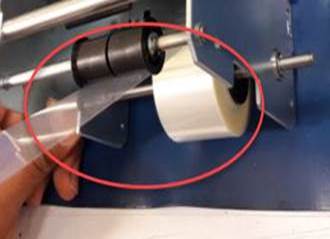
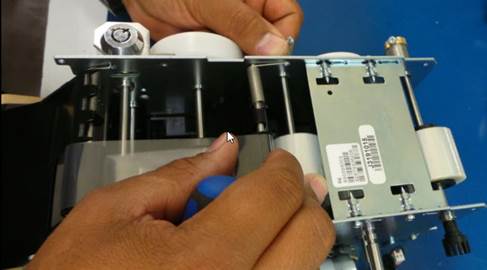
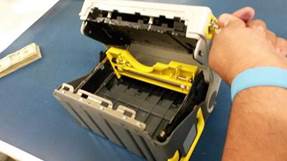
Antes de instalar el reciclador a la cama de prueba es de suma importancia que examine la unidad, verifique que no tenga daño físico o partes quebradas.
Before installing the recycler to the test bed, it is of utmost importance that you examine the unit, verify that it has no physical damage or broken parts.
Si el daño es considerable, debe marcarse como SCRAP.
If the damage is considerable, it should be marked as SCRAP.
Para dar inicio a las pruebas debe revisar la etiqueta MSN donde viene la revisión del reciclador. Elabore un archivo Excel donde ingresara la información del reciclador, como es el número de Track, número de serie, MSN, Ciclos, falla y versión.
To start the tests, you should check the MSN label where the recycler revision comes from. Create an Excel file where you will enter the recycler information, such as the Track number, serial number, MSN, Cycles, failure and version.
La revisión es el 5to y 6to digito del MSN de la etiqueta que se encuentra en el lateral derecho del reciclador.
The revision is the 5th and 6th digit of the MSN of the label that is on the right side of the recycler.
|
|

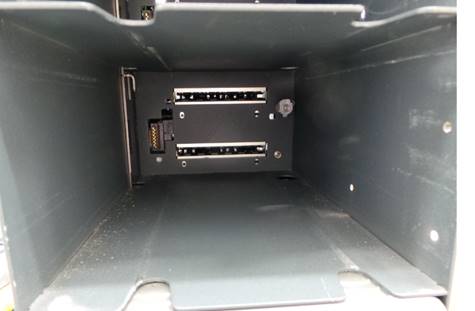
Con la cama de prueba encendida. Introduzca el reciclador en la cama de prueba MEI BNR.
With the test bed on. Insert the recycler into the MEI BNR test bed.
|
|
|
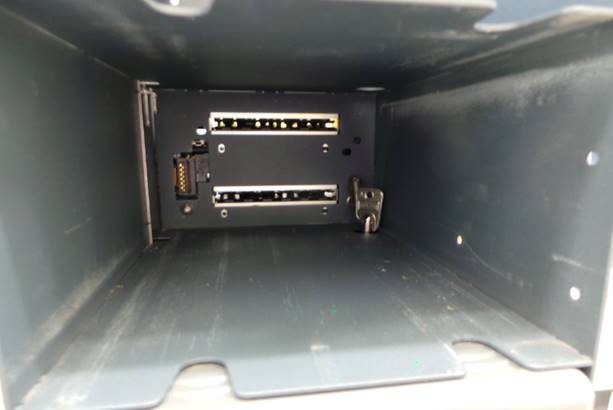
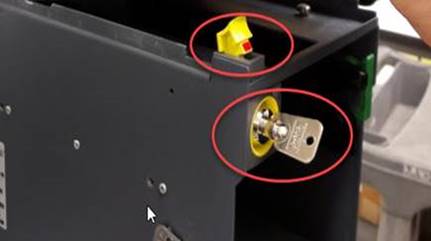
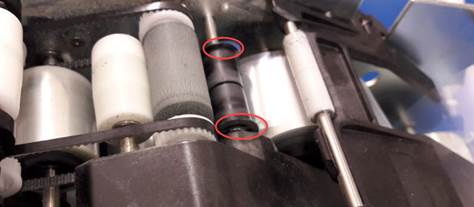
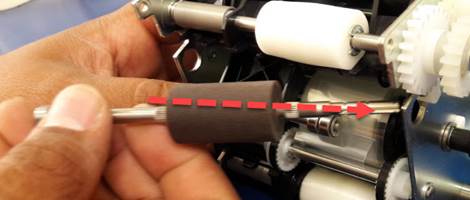
Cierre el seguro girando la llave hacia la izquierda. 
Close the lock by turning the key to the left.
|
|
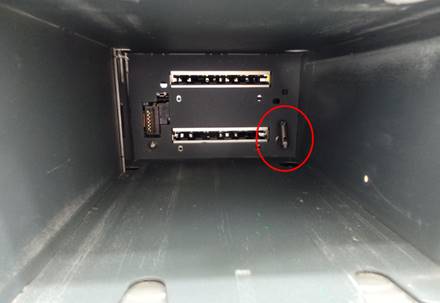
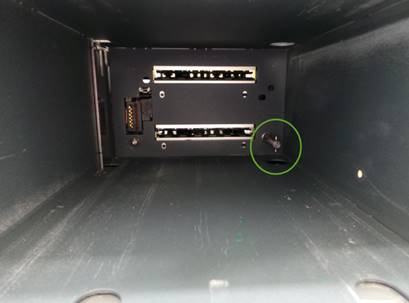
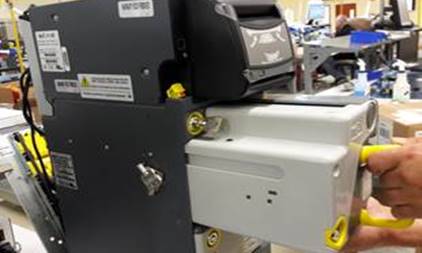
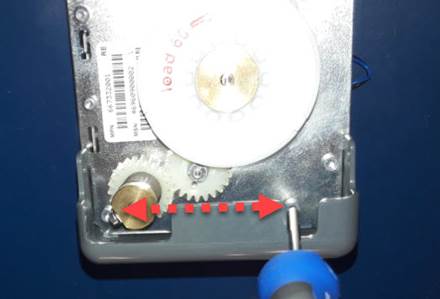
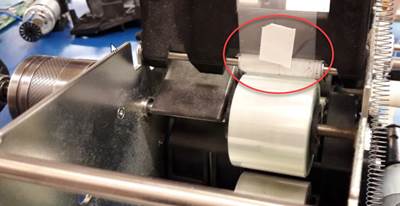
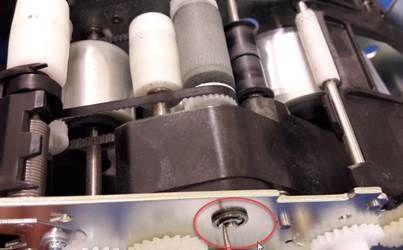
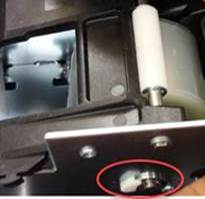
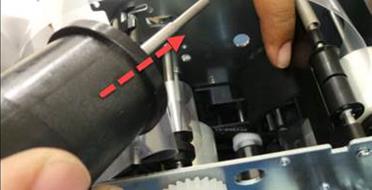
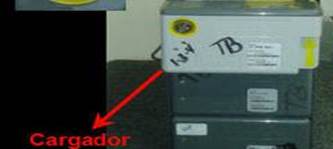
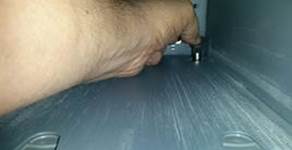
Antes de insertar el cargador (Loader) asegúrese de bajar el perno y entonces, introducir el cargador (Loader).
Before inserting the Loader make sure to lower the bolt and then insert the Loader.
|
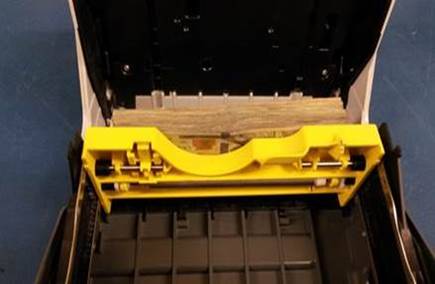
Posición incorrecta Incorrect position |
Posición correcta Correct position |
|
|
|
Nota: los diagnósticos se guardan si el cliente lo solicita.
Note: Diagnostics are saved if requested by the customer.
|
TÉCNICO: Debe guardar los diagnosticos. |
TECHNICIAN: Should save the diagnostics. |
Los técnicos deben generar y guardar el diagnóstico. Siga los siguientes pasos:
Technicians must generate and save the diagnosis. Follow the next steps:
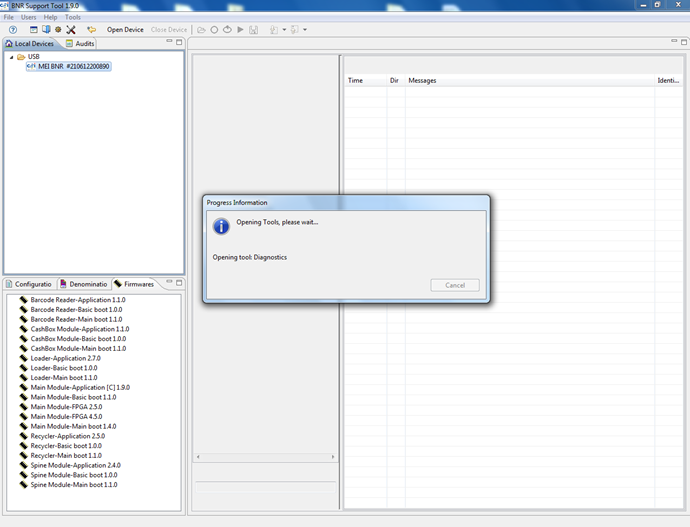
Con la cama de prueba lista y preparada, seleccione el icono CPI
BNR Support Tool: 
With the test bed set and ready, select the CPI BNR Support Tool icon:
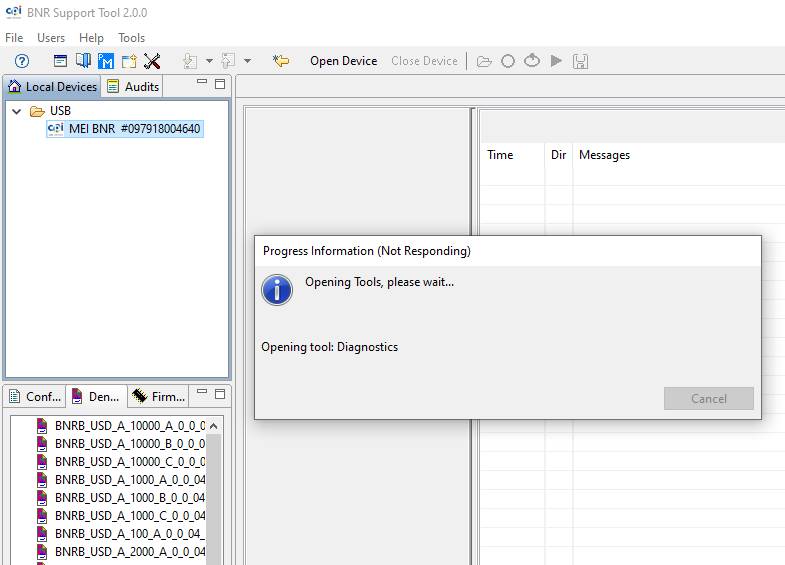
Se abrirá el programa de prueba.
The testing program will open.
|
|

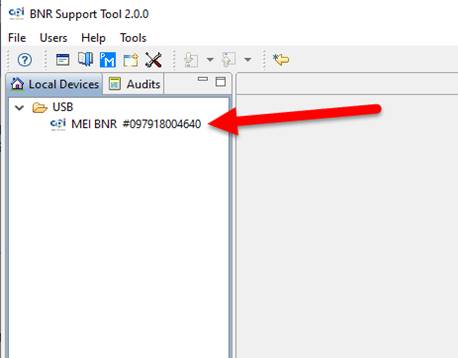
En la siguiente ventana seleccione MEI BNR XXXXXXXXXXX.
In the next window select MEI BNR XXXXXXXXXXX.
|
El programa se abrirá. The program will open.
En la pestaña de diagnóstico seleccione Reset Refresh: In the diagnostic tab select Reset Refresh:
|
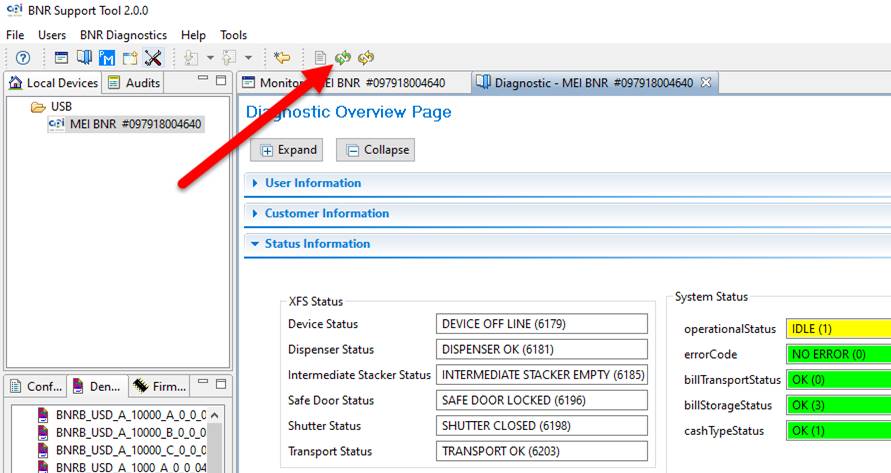
Al término del Reset:
At the end of the Reset:
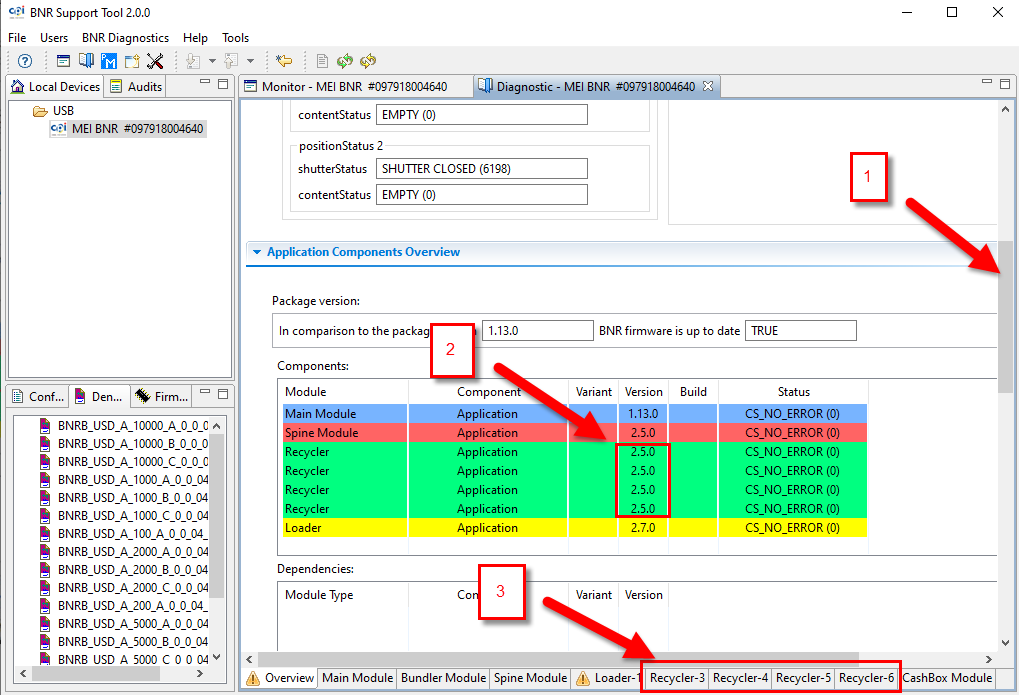
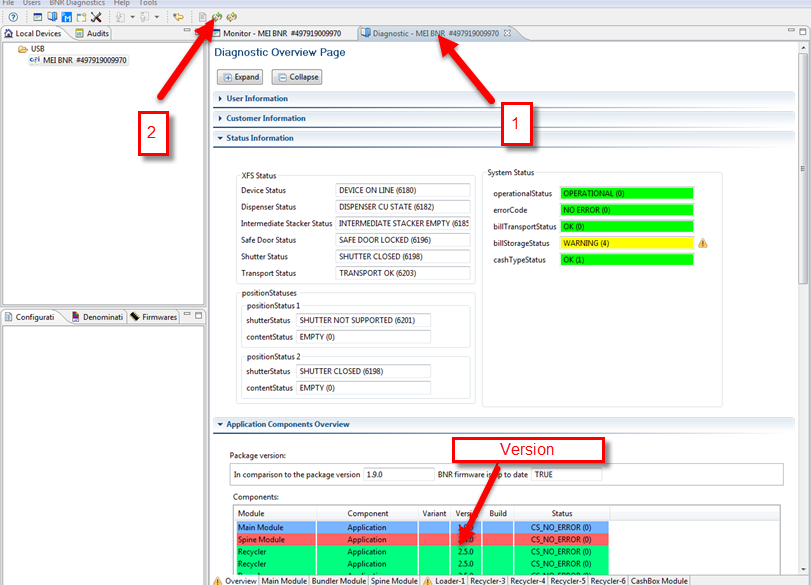
1 – Deslice la barra lateral hacia abajo hasta encontrar las versiones de los recicladores.
1 – Slide the sidebar down until you find the recycler versions.
2 – La versión debe de ser 2.5.0 o superior.
2 – The version must be 2.5.0 or higher.
3 – Si los recicladores presentan alguna falla se podrá identificar en estas pestañas.
3 – If the recyclers have a fault, they can be identified in these tabs.
En su archivo Excel debe anotar el error y la versión.
In your Excel file you must write down the error and the version.
|
|
GENERAR UN DIAGNÓSTICO EN SUPPORT TOOL / GENERATE A DIAGNOSIS IN SUPPORT TOOL
NOTA: Debe guardar los diagnósticos.
NOTE: You must save the diagnostics.
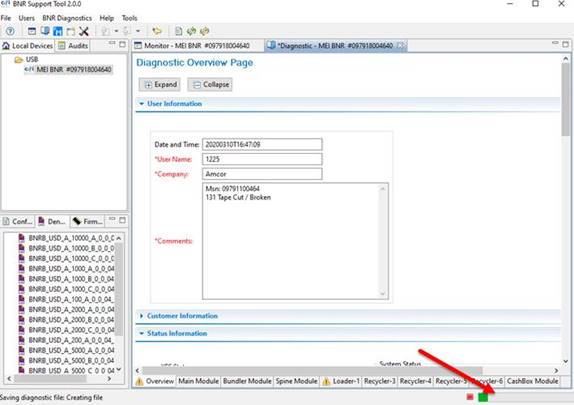
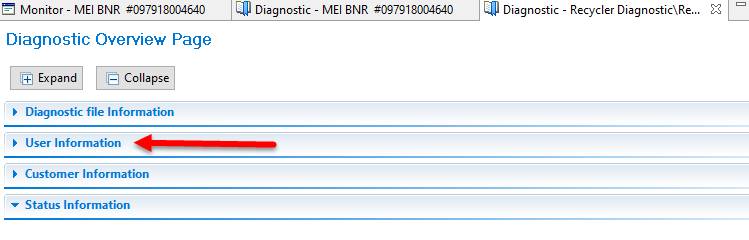
Seleccione – Select User Information
|
|
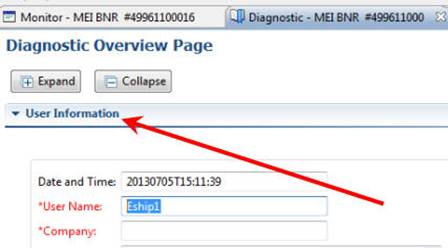
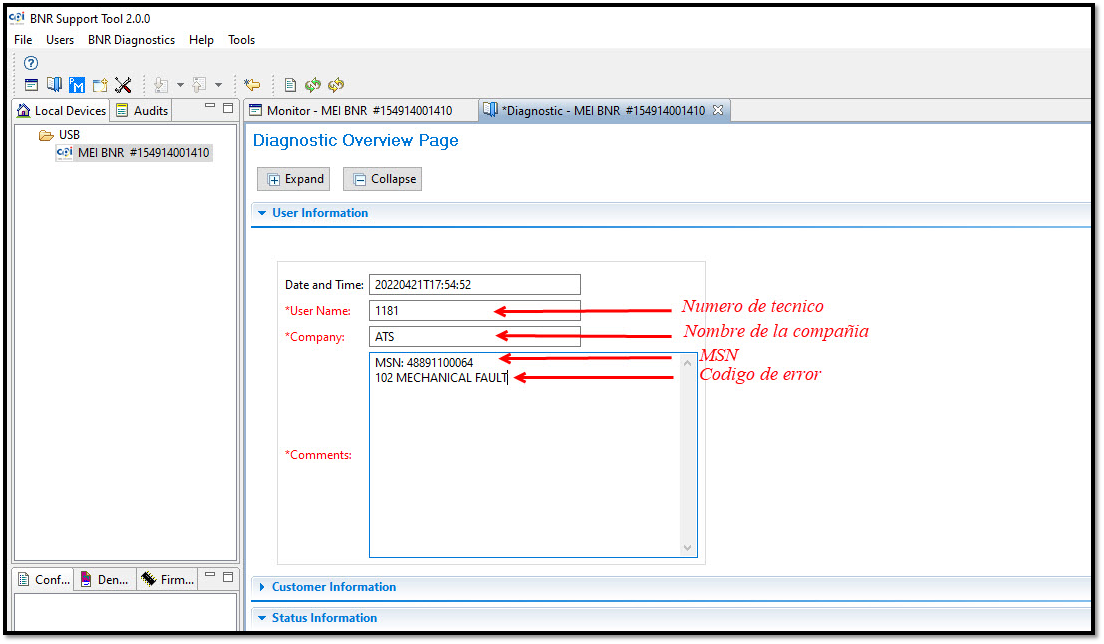
Llene las siguientes casillas: User Name – Company – Comments.
Fill in the following blanks: User Name-Company-Comments.
|
|
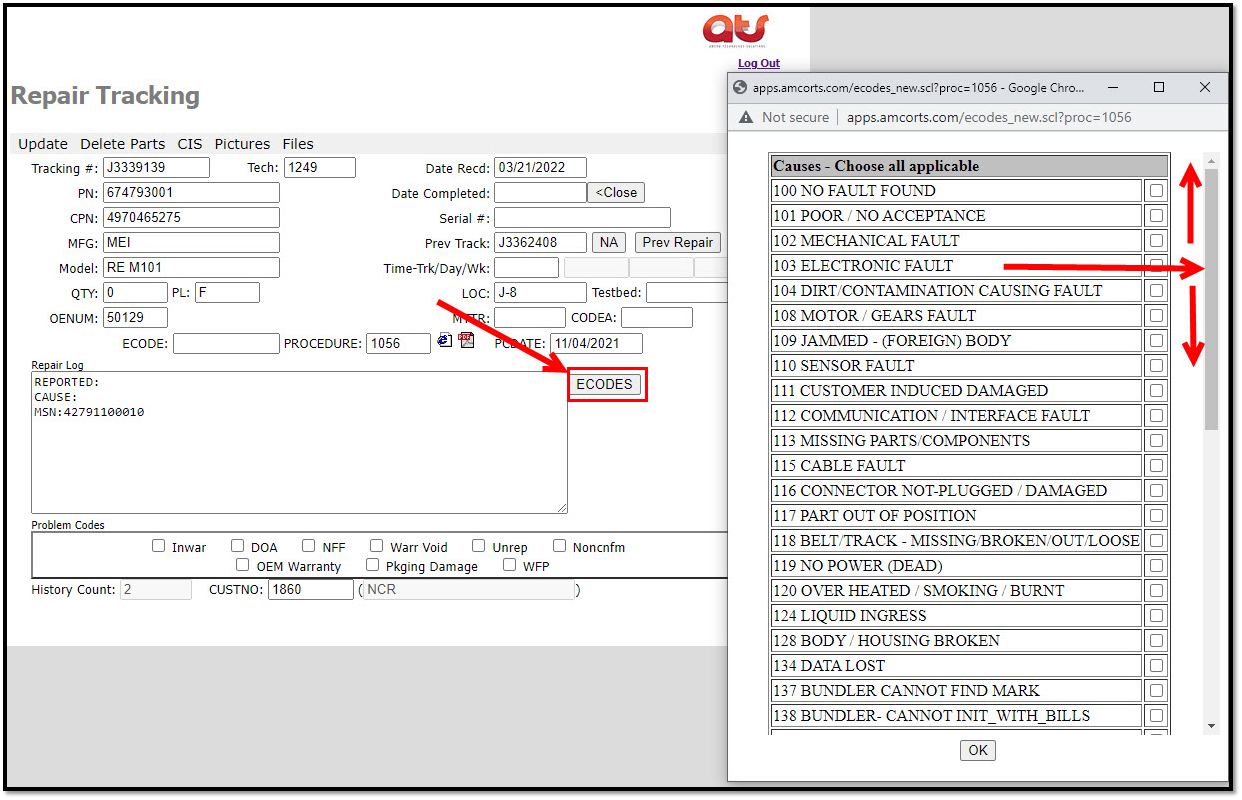
En la página oficial de ATS seleccione la opción (ECODES), localice la barra gris y deslice hacia arriba y hacia abajo para escoger el código de error enumerado y su descripción que le encontró a la unidad.
On the official ATS page select the option (ECODES), locate the gray bar and slide up and down to choose the listed error code and its description found on the unit.
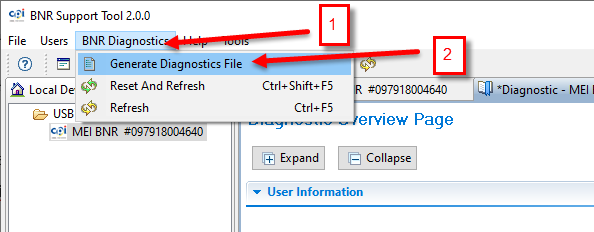
En la barra de herramientas seleccione BNR Diagnostics (1).
In the toolbar select BNR Diagnostics (1).
Seleccione Generate Diagnostics File (2).
Select Generate Diagnostics File (2).
|
|
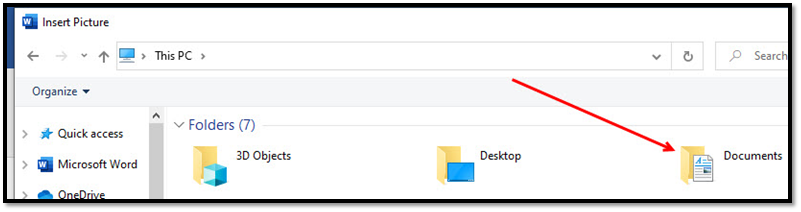
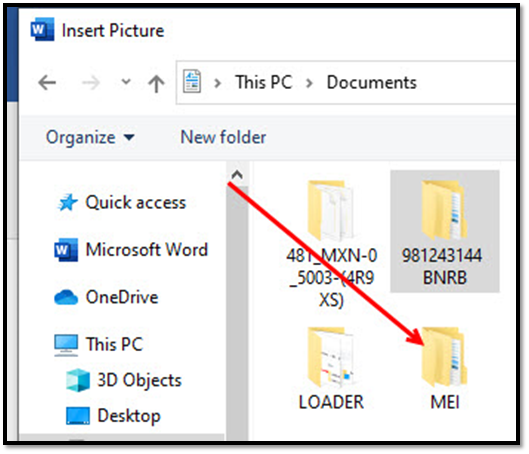
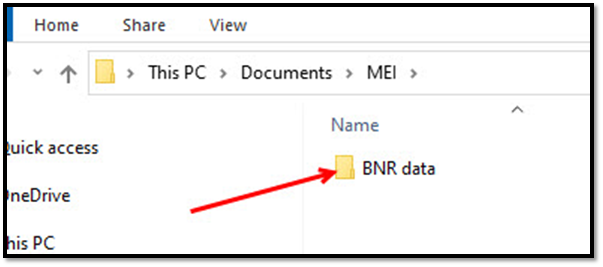
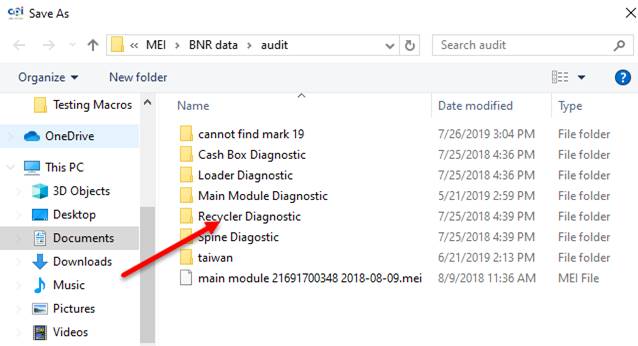
En su PC localice y vaya abriendo los folders: Documents, MEI, bnr data, Audit hasta encontrar el Folder Recycler Diagnostic
On your PC locate and open the folders: Documents, MEI, bnr data, Audit until you find the Folder Recycler Diagnostic
Documents
MEI
BNR data
Audit
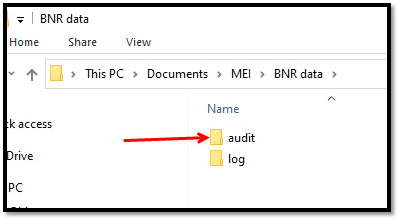
Localice y haga doble clic en la carpeta Recycler Diagnostic.
Locate and double-click the Recycler Diagnostic folder.
|
|
En el área de nombre del archivo (File name) ingrese la siguiente información tal y como se indica:
In the File name area, enter the following information as indicated:
El nombre del modelo, en este caso es recycler, msn, fecha (aaaa-mm-dd) y .mei al final.
The model name, in this case is recycler, msn, date (yyyy-mm-dd) and .mei at the end.
|
|
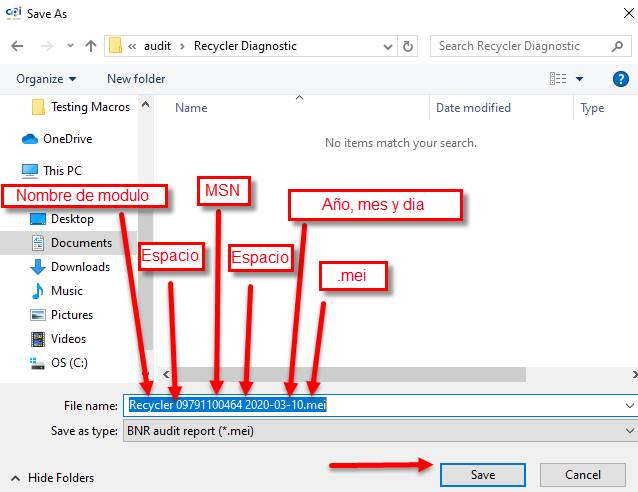
Al terminar seleccione guardar (Save).
When finished select Save.
Comenzará a cargar la información.
The information will start to load.
|
|
Para verificar la información del diagnosticó, realice los siguientes pasos:
To verify diagnostic information, perform the following steps:
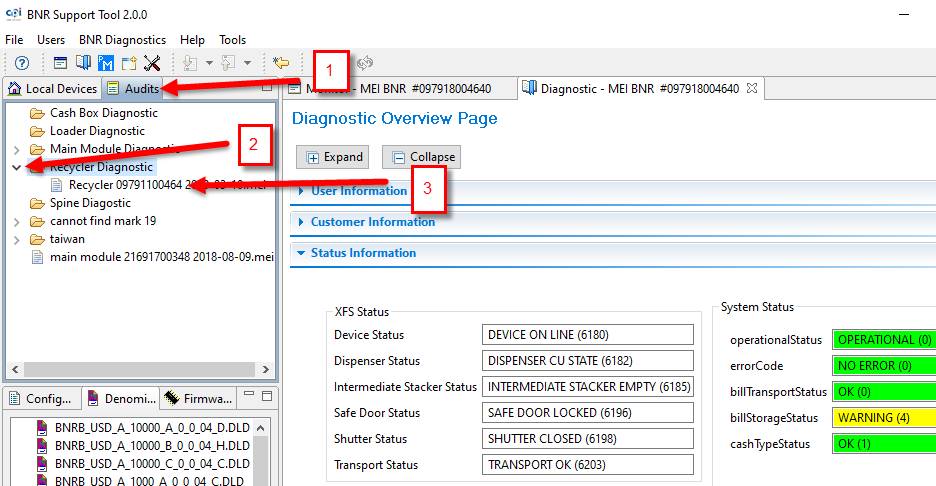
1 – Seleccione la pestaña de Audits.
1 - Select the Audits tab.
2 – En el folder Recycler
Diagnostic, haga clic en la flecha para expandir menú: ![]()
2 - In the Recycler Diagnostic folder, click the arrow to expand menu:
3 – Seleccione el diagnostico que desee verificar, se puede guiar por el MSN o por la fecha en la que se generó.
3 - Select the diagnosis you want to verify; you can be guided by the MSN or by date that it was generated.
|
|
Para verificar información guardada del diagnóstico, realice los siguientes pasos:
To verify saved diagnostic information, perform the following steps:
1 – Seleccione el diagnóstico del Recycler que desea revisar.
1 - Select the diagnosis of the Recycler you want to review.
2 - Abrirá otra pestaña.
2 - It will open another tab.
|
|
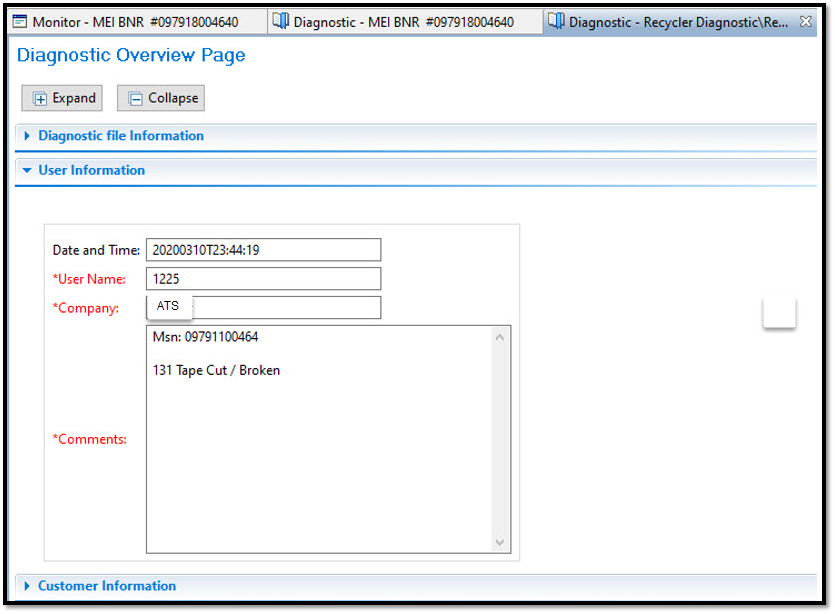
En la misma pestaña, localice y seleccione la opción de User Information.
On the same tab, locate and select the User Information option.
|
|
Al desplegar la pestaña de User Information, podrá verificar toda la información adherida al diagnóstico guardado, así como también puede verificar cualquier información del reciclador como la falla, MSN y Ciclos.
By displaying the User Information tab, you will be able to verify all the information attached to the saved diagnosis, as well as verify any recycler information such as failure, MSN and Cycles.
|
|
COMO OBTENER LOS CICLOS DEL RECICLADOR / HOW TO GET RECYCLER CYCLES
Continuando en la pestaña de diagnóstico, seleccione el Recycler-3 en la barra inferior.
Continuing on the diagnostic tab, select the Recycler-3 in the bottom bar.
|
|

1 – Utilizando la barra lateral deslice hacia abajo hasta encontrar la opción de History.
1 - Using the sidebar, slide down until you find the History option.
2 – Haga clic para desplegar el menú de History.
2 - Click to display the History menu.
|
|

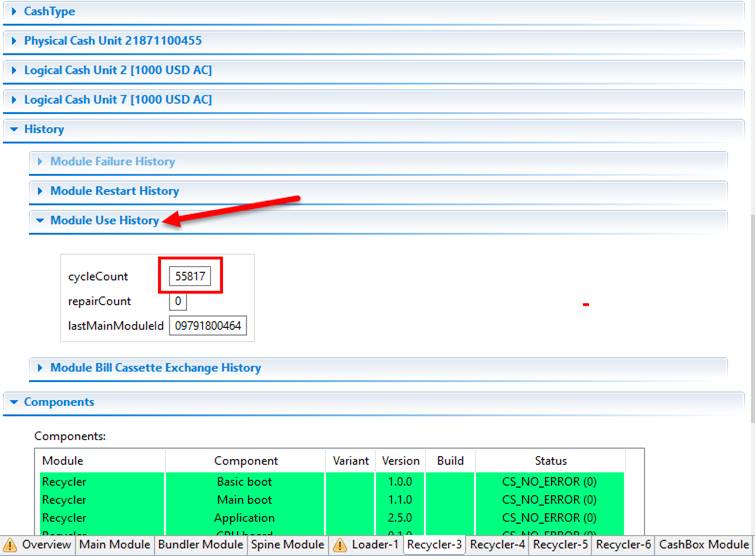
Seleccione – Select Module Use History.
En el apartado de cycleCount aparecen los ciclos de reciclador, anote el dato en el archivo de Excel.
In the cycleCount section the recycler cycles appear, write down the data in the Excel file.
|
|
|
|
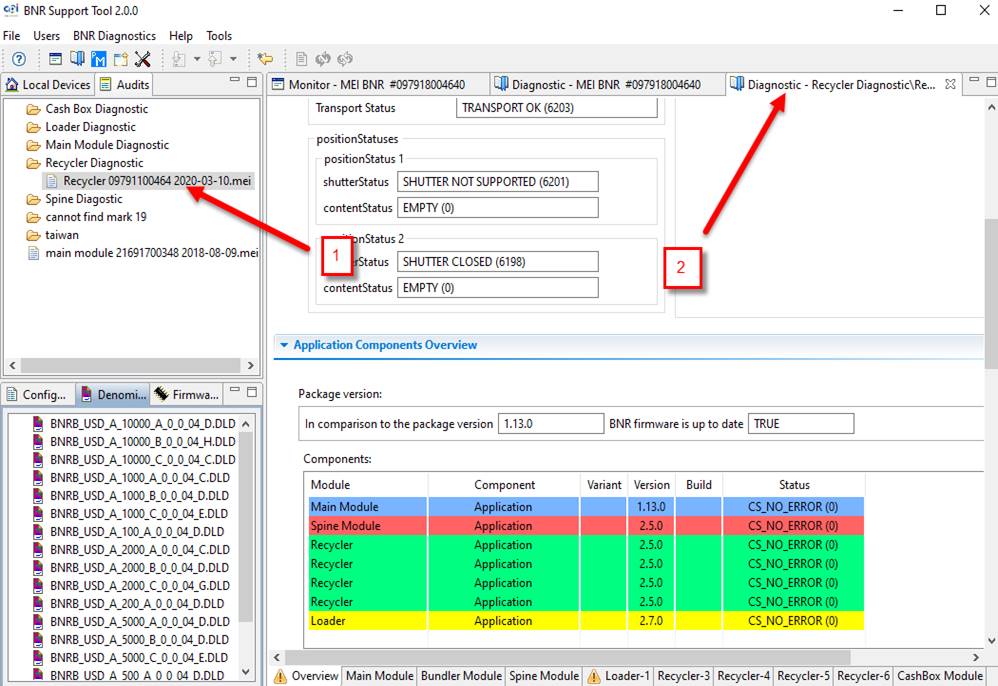
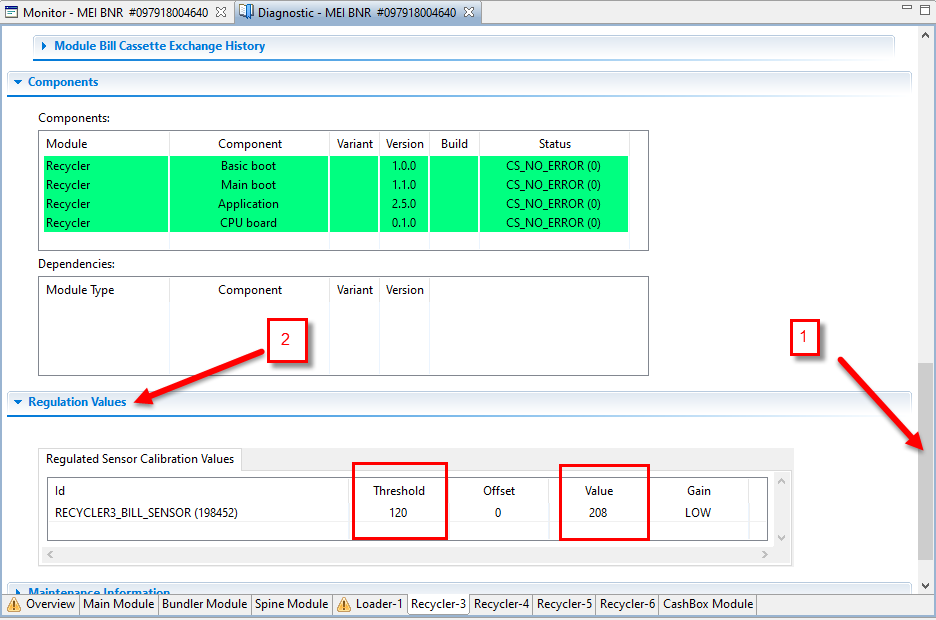
Ø Como verificar los valores de regulación del reciclador; siga los siguientes pasos:
How to check the values of the recycler sensors; follow the next steps:
En la pestaña de Diagnostic, seleccione Reciclador 3:
On Diagnostic tab, select Recycler 3:
1 – Deslice la barra hacia abajo para encontrar Regulation Values.
1 – Slide the bar down to find Regulation Values.
2 – Seleccione Regulation Values.
2 – Select Regulation Values.
Ejemplo: El valor (Value) 461 debe ser mayor que el límite (Threshold) 267.
Example: The value (Value) 461 must be greater than the limit (Threshold) 267.
|
|
Repita la operación anterior para todos los recicladores.
Repeat the previous operation for all recyclers.
Si el reciclador no presenta ningún error, debe realizar las pruebas con los billetes para verificar que no se atoren, en caso de que así suceda, proceda a su mantenimiento y reparación.
If the recycler does not show any errors, it must carry out the tests with the banknotes to verify that they do not get stuck, in case this happens, proceed with their maintenance and repair.
PRUEBA CON LOS BILLETES / TEST WITH BANKNOTES
Mientras realice la prueba debe revisar que la unidad:
While performing the test, you must check that the unit:
-No realice ruidos extraños
-Do not make strange noises
-No atasque los billetes
-Do not jam the bills
-Revisar que la cantidad de los billetes que dispensa la unidad sea la correcta (la cantidad que se está solicitando).
-Check that the amount of the bills dispensed by the unit is correct (the amount that is being requested).
Siga las siguientes instrucciones:
Follow the instructions below:
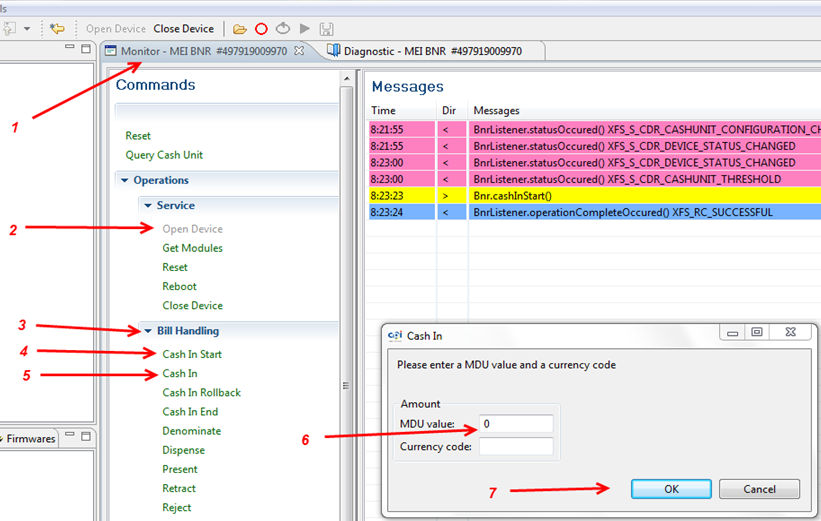
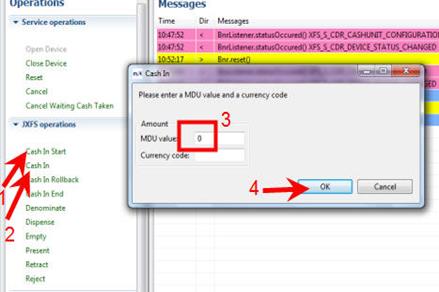
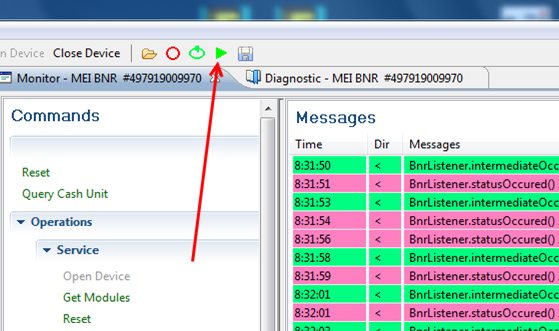
1. Seleccione - Select Monitor- MEI BNR
2. Seleccione - Select Open Device
3. Seleccione - Select Bill Handling
4. Seleccione - Select Cash in Start
5. Seleccione - Select Cash In
6. Localice campo MDU y escriba el número 0 – Locate MDU blank and write number 0
7. Seleccione - Select OK
|
|
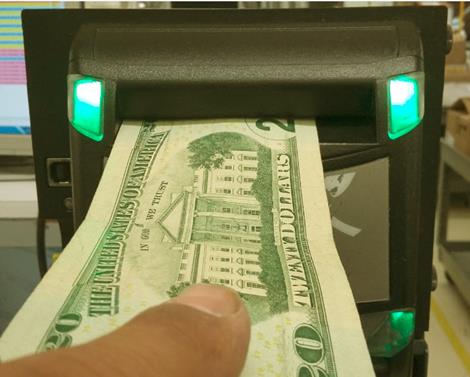
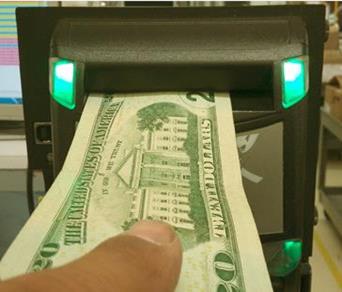
Los LEDs de color verde indican que la unidad esta lista para que ingresemos los billetes.
The green LEDs indicate that the unit is ready for us to insert the bills.
|
|
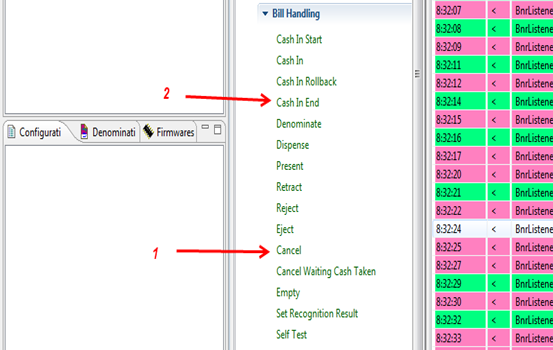
Al finalizar la inserción de billetes ubique en el lateral izquierdo del programa las opciones:
At the end of the insertion of banknotes, locate the options on the left side of the program:
1 - Cancel
2 - Cash In End
|
|
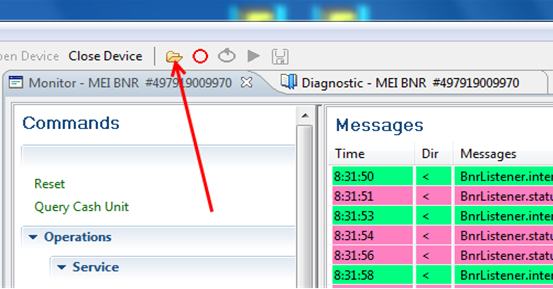
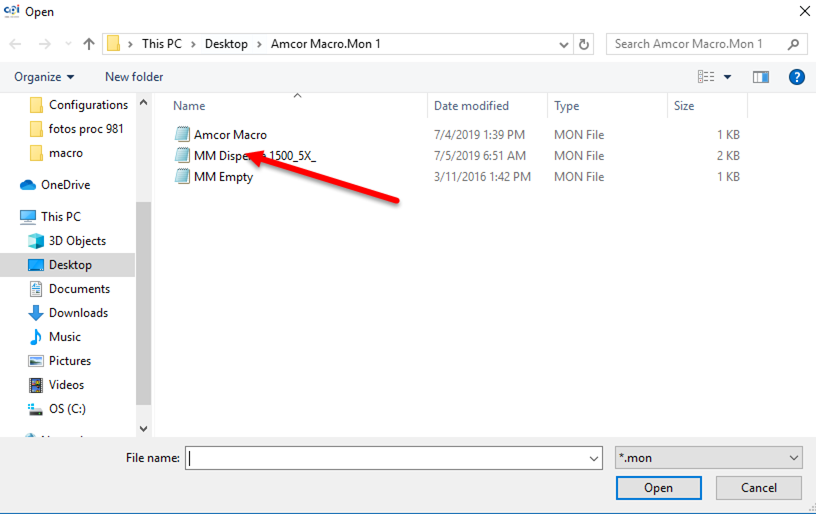
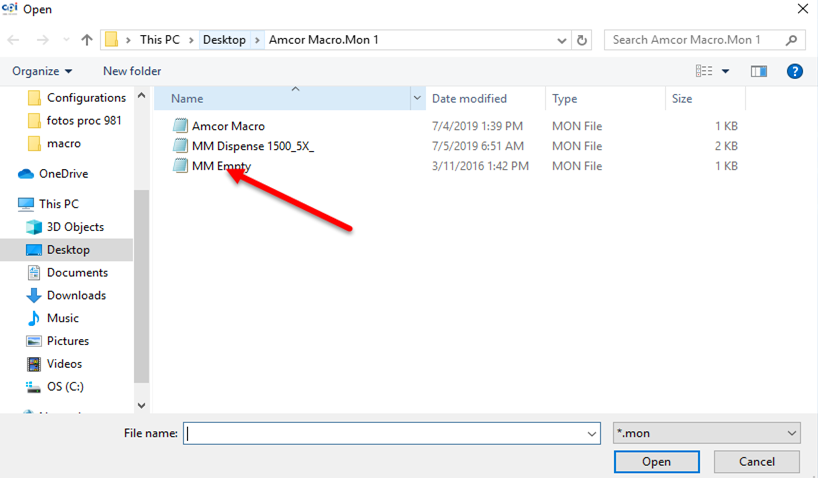
Seleccione el icono del folder.
Select the folder icon.
|
|
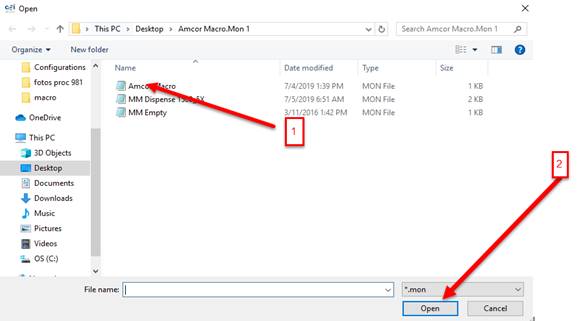
1. Select Amcor Macro
2. Seleccione Open
2. Select Open
|
|
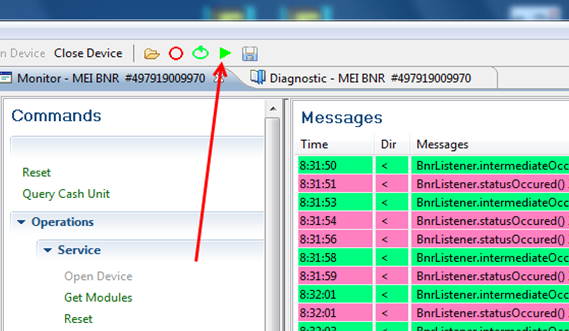
Select Play to send the bills to the cash-box, after that you must take out the cash-box and withdraw the bills.
|
|
Desconecte el cable de alimentación, cable USB y desmonte el reciclador de la cama de prueba.
Disconnect the power cord, USB cable, and remove the recycler from the test bed.
Retire caja de efectivo siguiendo los siguientes pasos:
Remove cash-box by following the steps below:
1. Abra llave y levante la bandera – Open the key and lift flag 2. Retire la caja de efectivo – Remove the cash-box
3. Abra la caja girando llave – Open the box by turning the key 4. Retire y cuente los billetes – Retrieve the bills and count them

NOTA: Si el reciclador presenta alguna falla no realice el cambio de versión, proceda a su mantenimiento y/o reparación. Después de reparar realice el cambio de versión.
NOTE: If the recycler fails, do not make the version change proceed with its maintenance and / or repair. After repairing make the version change.
CAMBIO DE VERSIÓN / VERSION CHANGE
La versión más actual por el momento es 2.5.0
The most current version at the moment is 2.5.0
NOTA: El cambio de versión solo se efectuará cuando el BNR este programado con una denominación de billetes diferente a la americana o cuando la versión sea inferior a 1.9.0.
NOTE: The version change will only be made when the BNR is programmed with a different banknote denomination than the American one or when the version is less than 1.9.0.
Para cambiar la versión, siga los siguientes pasos:
To change the version, follow the next steps:
Seleccione el icono: 
Select the icon:
Seleccione MEI BNR #XXXXXXXXXXX (información de la unidad).
Select MEI BNR #XXXXXXXXXXX (unit info).
|
|
1 – Seleccione Diagnostic MEI BNR.
1 - Select Diagnostic MEI BNR.
2 – Seleccione reset refresh; la unidad empezará a prepararse, en la parte inferior en la opción de Application Components Overview podrá observar la versión que tiene la unidad.
2 - Select reset refresh; the unit will begin to prepare, at the bottom in the Application Components Overview option you can see the version that the unit has.
|
|
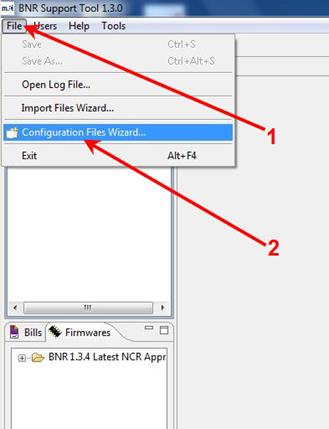
Se abrirá el programa, del cual seleccionará la opción File (1) después seleccione Configuration Files Wizard (2)
The program will open, from which you will select the option File (1) then select Configuration Files Wizard (2)
|
|
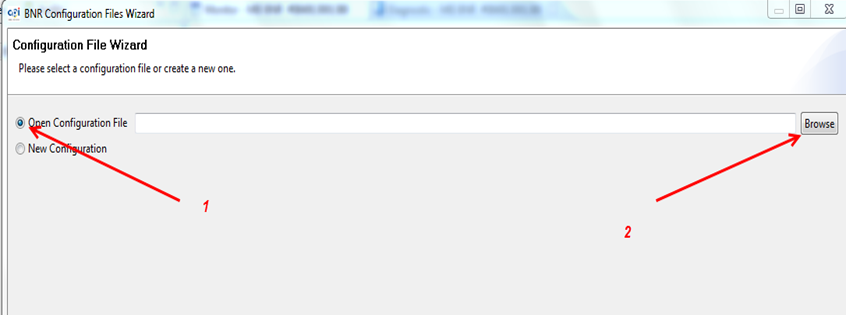
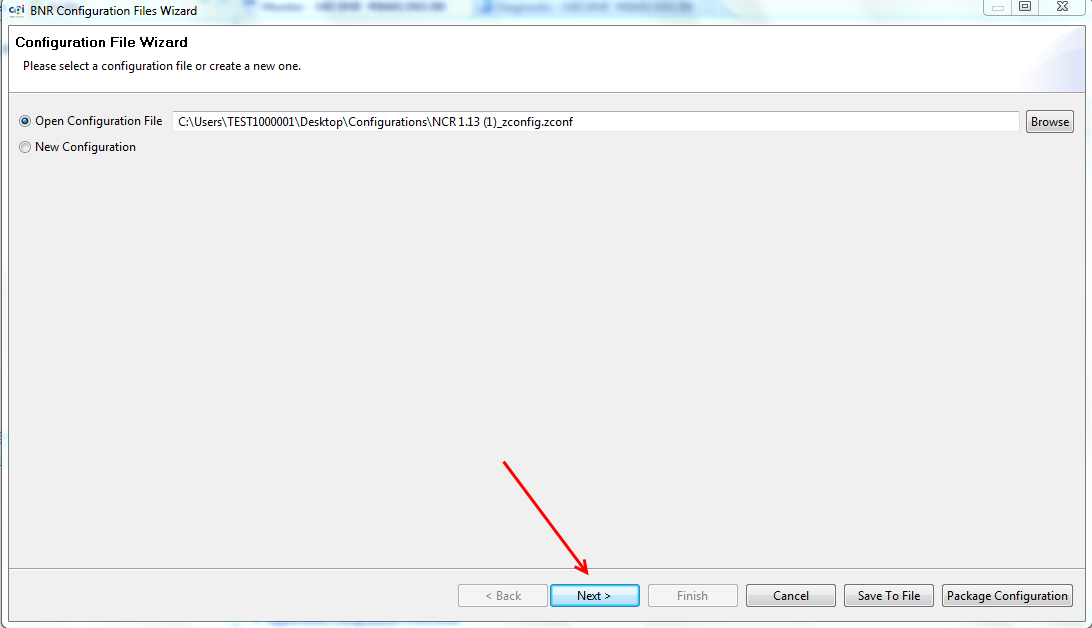
En la siguiente ventana que aparece:
In the next window that appears:
1- Seleccione – Select Open Configuration File
2- Seleccione – Select Browse
|
|
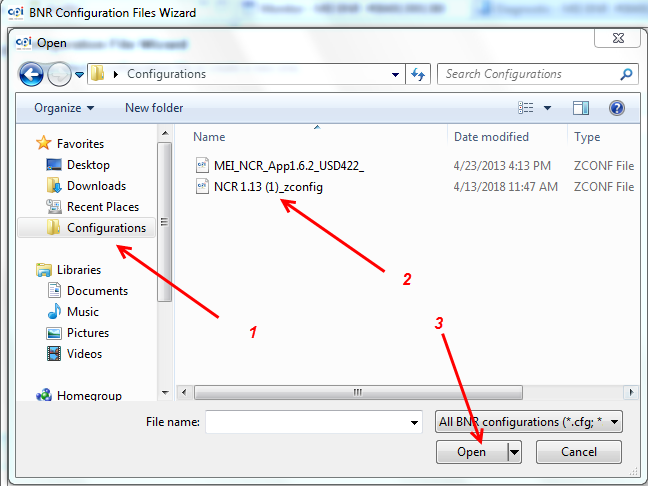
1- Seleccione – Select Configurations
2- Seleccione – Select NCR 1.13 (1)_zconfig
3- Presione – Press Open
|
|
Seleccionar – Select: Next
|
|
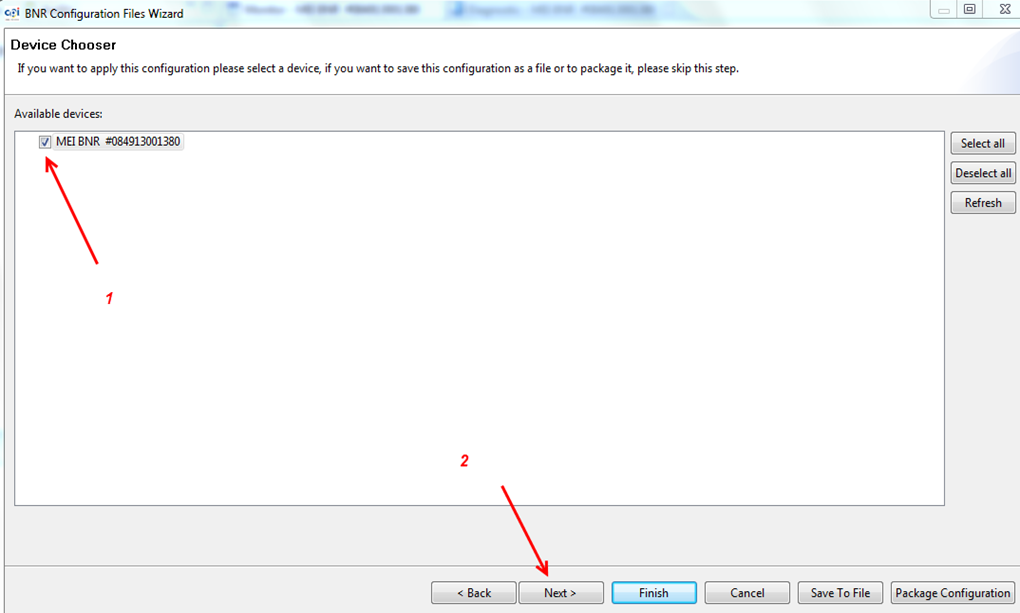
1- En la siguiente ventana seleccione MEI BNR #xxxxxxxxxxx
1- In the next window select MEI BNR #xxxxxxxxxxx
2- Seleccione Next
2- Select Next
|
|
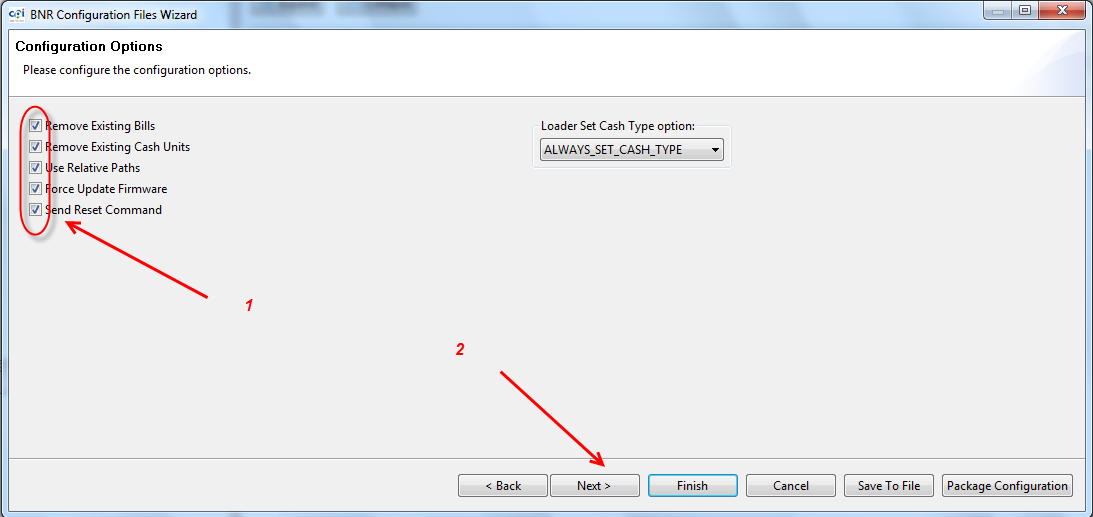
1- Verifique que estén todas las opciones seleccionadas.
1- Verify that all options are selected.
2- Seleccione Next; la versión comenzará a cargarse.
2- Select Next; the version will start loading.
|
|
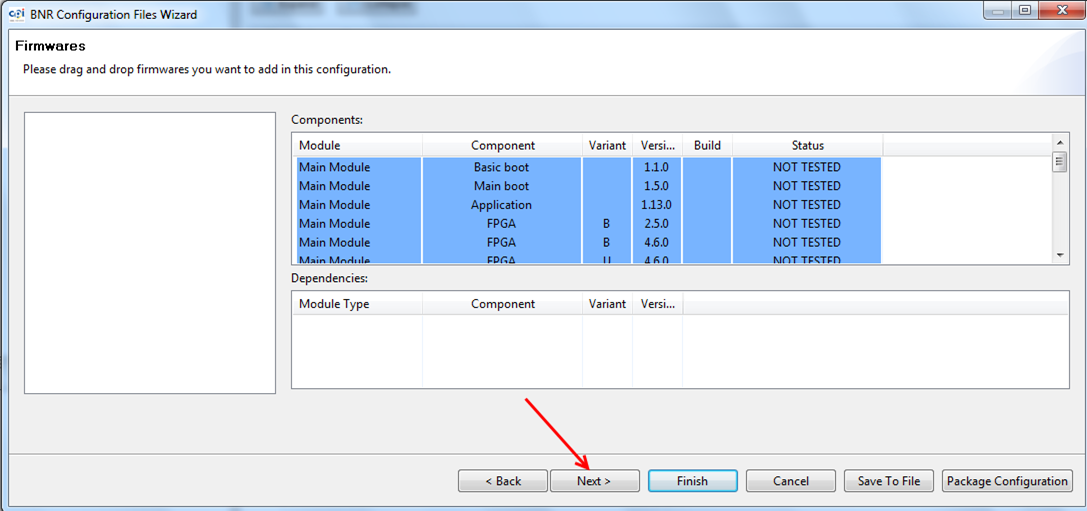
Seleccionar – Select: Next
|
|
Seleccionar – Select: Next
|
|

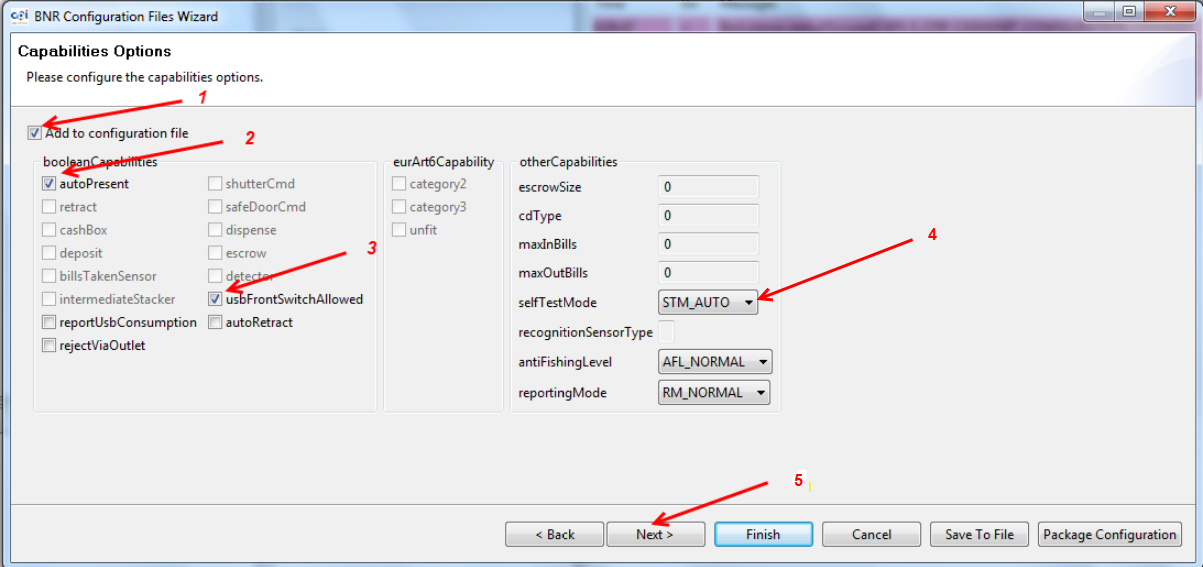
Seleccione como se indica a continuación:
Please select as below:
1 – Add to configuration file
2 – auto Present
3 – usbFrontSwitchAllowed
4 – STM_ AUTO
5 – Next
|
|
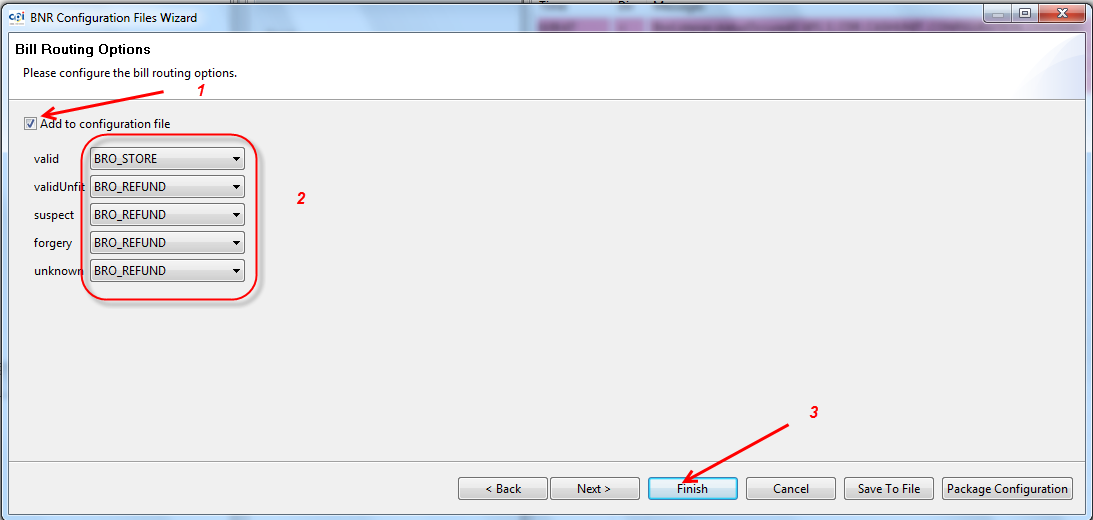
Seleccione y configure como se indica a continuación:
Select and configure as follows:
1 – Add to configuration file
2 – Valid = BRO_STORE / validUnfit, suspect, forgery, unknown = BRO_REFUND
3 – Finish
|
|
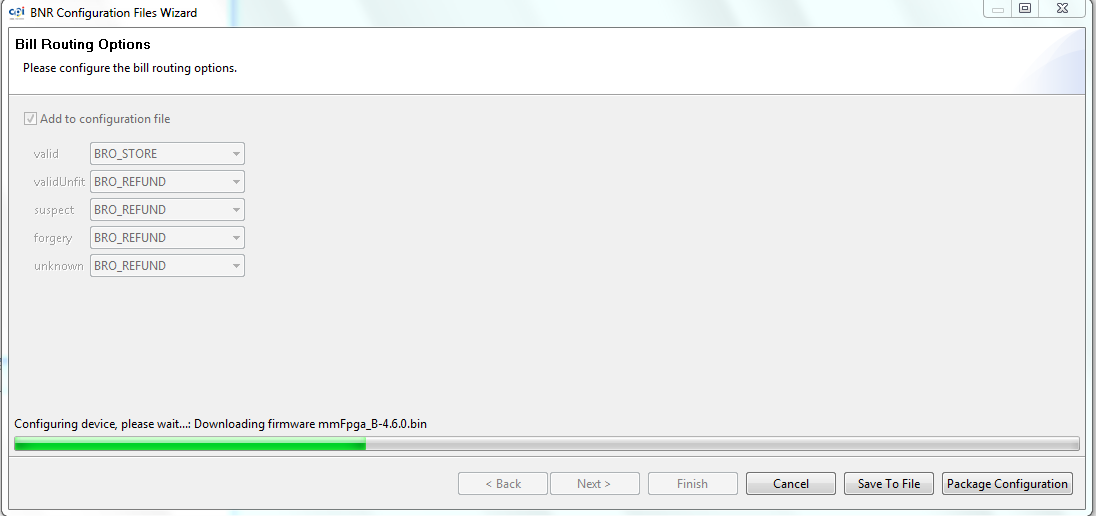
Empieza a cargar Firmware.
Firmware starts to load.
|
|
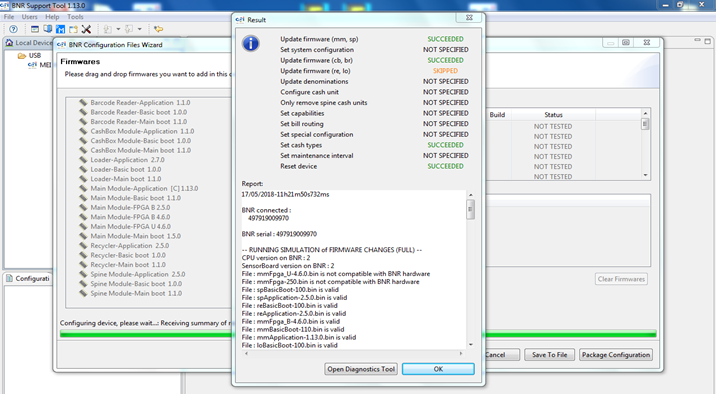
Al finalizar presionar OK.
When finished press OK.
|
|
Retire el reciclador de la cama de prueba para realizar el mantenimiento y reparación.
Remove the recycler from the test bed for maintenance and repair.
MANTENIMIENTO Y REPARACIÓN / MAINTENANCE AND REPAIR
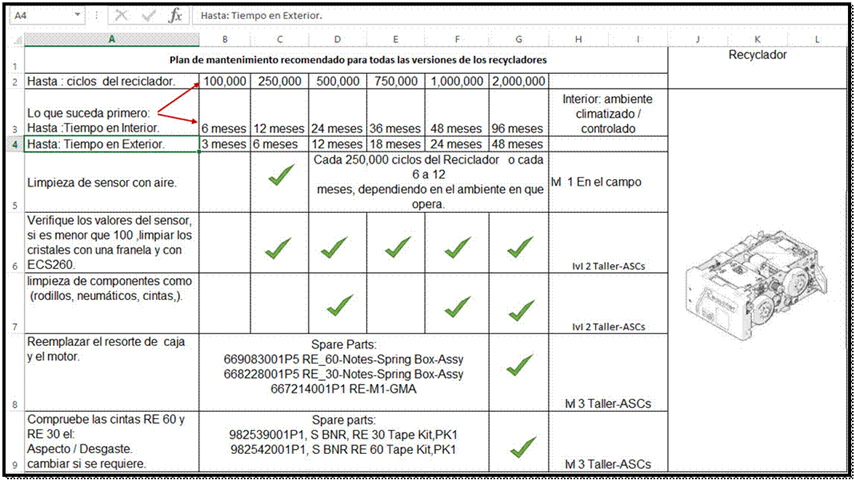
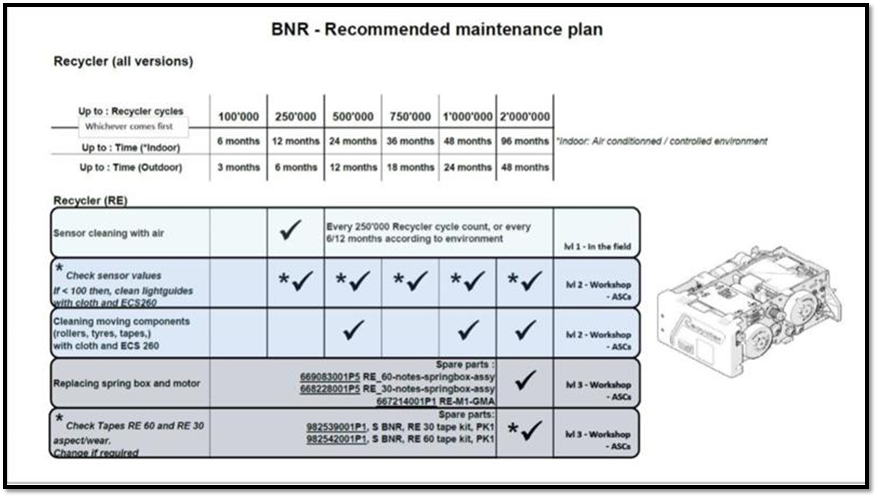
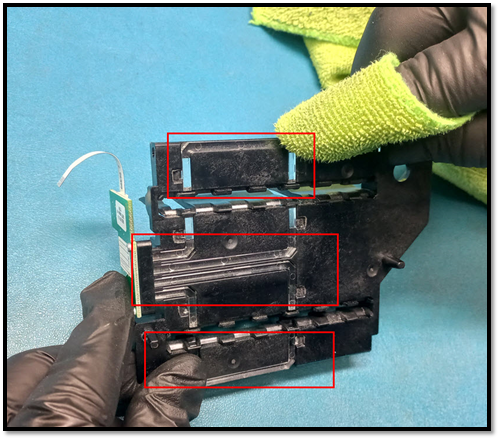
NOTA: Debe realizar el mantenimiento de acuerdo a la tabla, recuerde realizar la limpieza de la cinta Mylar sin usar herramientas punzocortantes para evitar dañar la cinta Mylar. Limpie rodillos y cristales de los sensores con una franela de microfibra humedecida con alcohol Isopropílico al 5%.
NOTE: You must perform the maintenance according to the table, remember to clean the Mylar tape without using sharp tools to avoid damaging the Mylar tape. Clean rollers and sensor crystals with a microfiber flannel moistened with 5% Isopropyl alcohol.
|
|
|
|
|
|
|
|
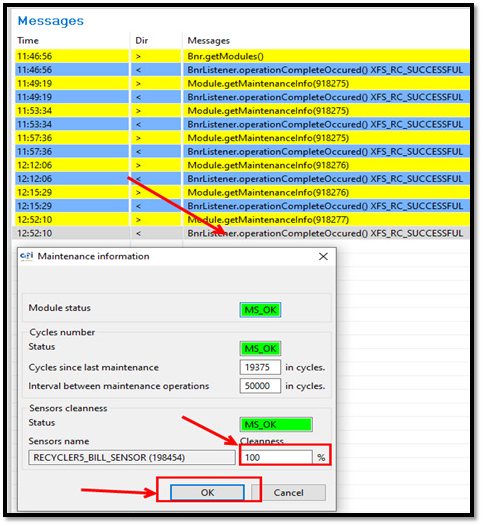
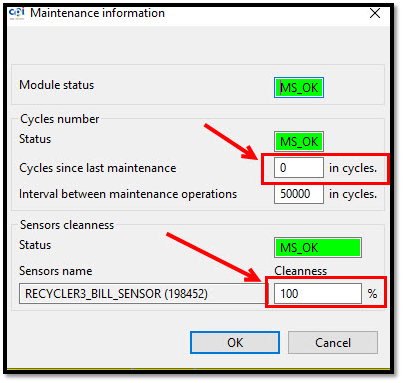
Para verificar el porcentaje de los sensores, con la unidad reseteada realice lo siguiente:
En la pestaña de monitor seleccione:
Open Device
Get Modules
Module Get Maintenance Info
To verify the percentage of the sensors, with the unit reset, do the following:
In the monitor tab select:
Open Device
Get Modules
Module Get Maintenance Info
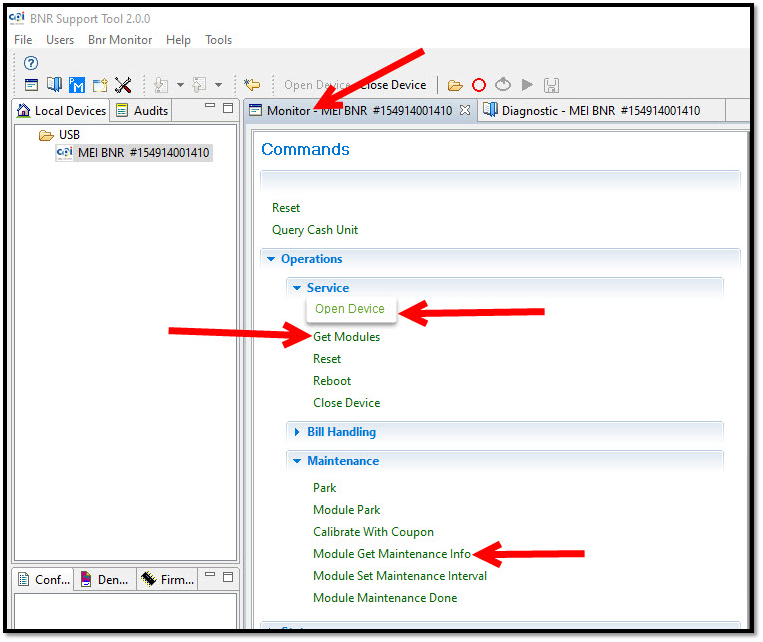
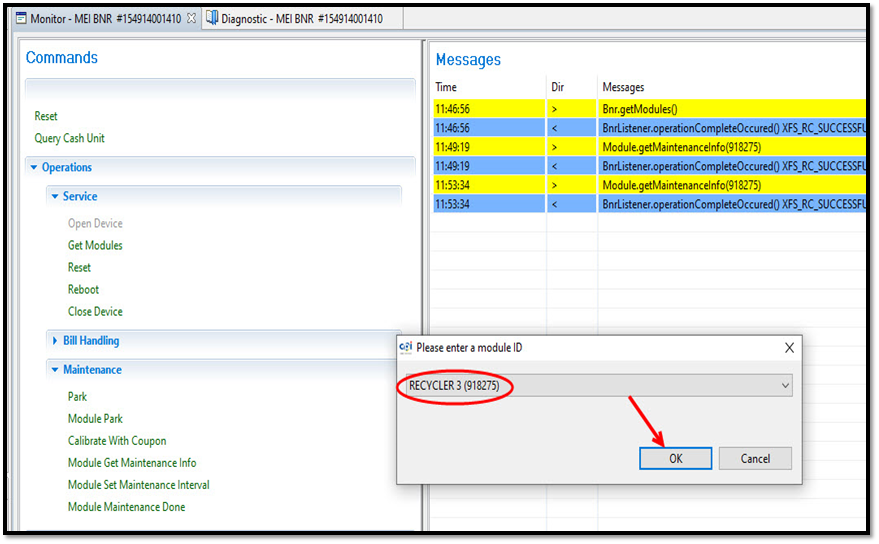
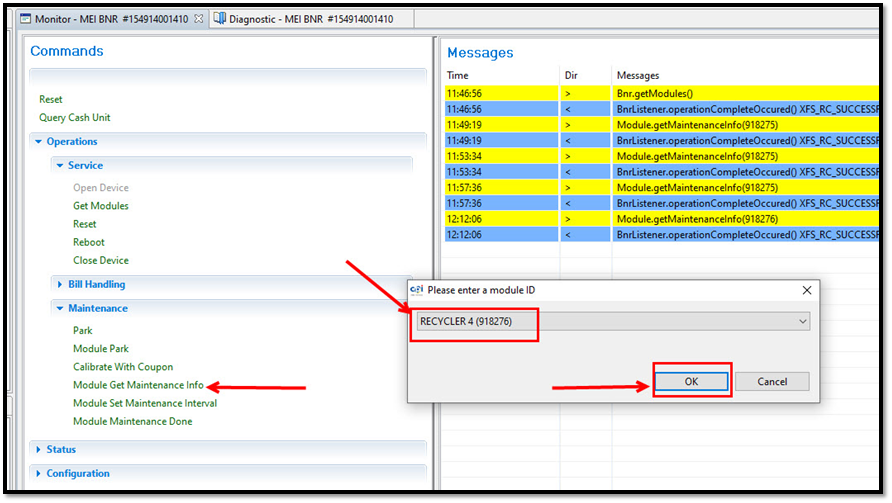
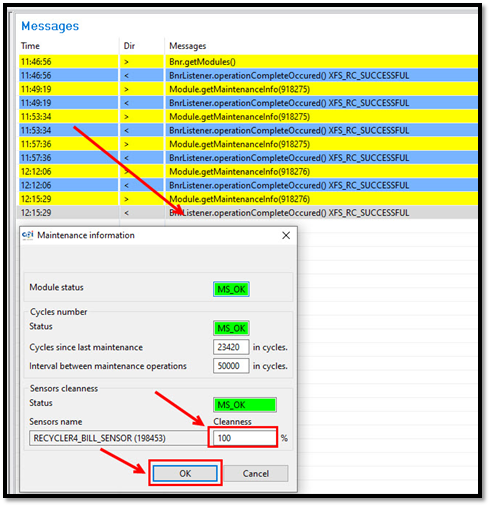
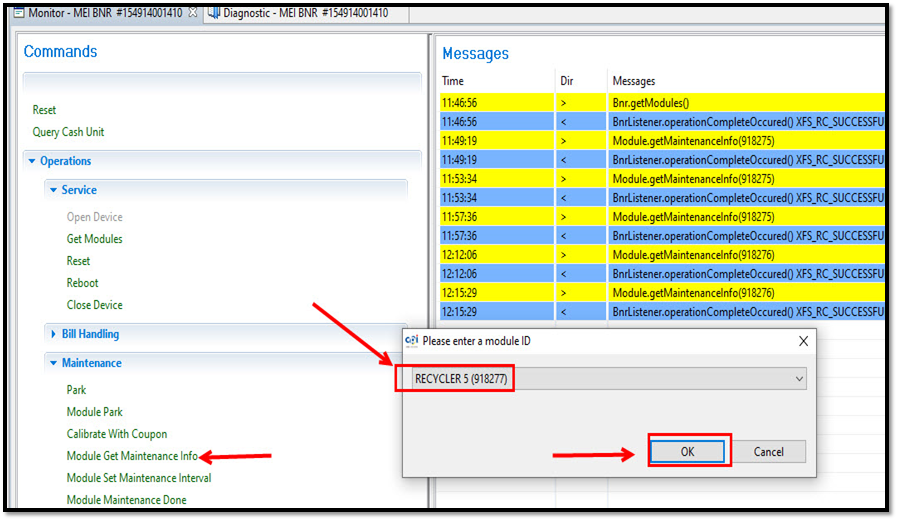
Se abrirá un menú donde deberá localizar la flechita lado derecho, seleccione de uno por uno RECYCLER 3,4,5 Y 6.
A menu will open where you must locate the little arrow on the right side, select one by one RECYCLER 3,4,5 AND 6.

Seleccione ok, de dos clics en el renglón azul y se abrirá una ventana con la información del percentage del Recycler 3 y ok.
Select ok, double click on the blue line and a window will open with information on the percentage of Recycler 3 and ok.
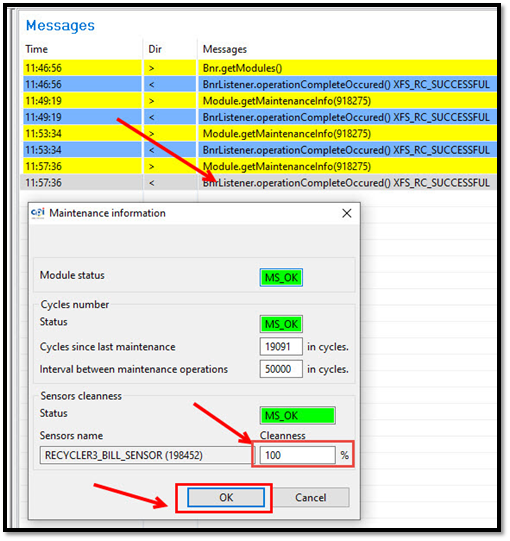
Seleccione Module Maintenence Info RECYCLER 4 ok, de dos clics en el renglón azul y se abrirá una ventana con la información del percentage del Recycler 4 y ok.
Select Module Maintenance Info RECYCLER 4 ok, double click on the blue line and a window will open with information on the percentage of Recycler 4 and ok.
Seleccione Module Maintenence Info RECYCLER 5 ok, de dos clics en el renglón azul y se abrirá una ventana con la información del percentage del Recycler 5 y ok.
Select Module Maintenance Info RECYCLER 5 ok, double click on the blue line and a window will open with information on the percentage of Recycler 5 and ok.
Seleccione Module Maintenence Info RECYCLER 5 ok,de dos clik en el renglon azul y se abrira una ventana con la informacion del percentage del Recycler 5 y ok.
Select Module Maintenance Info RECYCLER 5 ok, click twice on the blue line and a window will open with information on the percentage of Recycler 5 and ok.

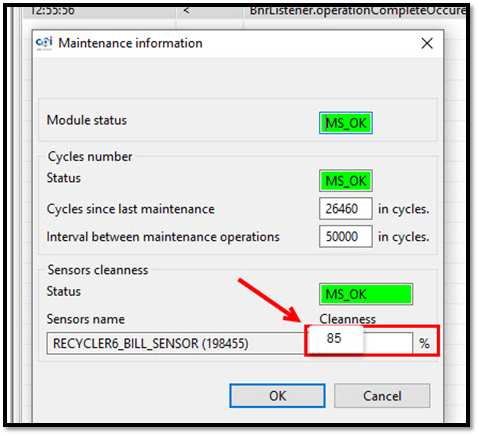
Si el porcentaje es menor de 100% ya sea en RECYCLER 3,4,5,6, se le debe de dar mantenimiento a los cristales con una franela húmeda con alcohol al 5% o Qiutip y teniendo la unidad ya armada y lista, en el software deberá de seleccionar la opción Module Maintenance Done 4 veces en caso de que salga bajo en los 4 Recicladores 3,4,5,6 , ahora volver a seleccionar Module Get Maintenance Info,4 veces Recicladores 3,4,5,6 esto es para verificar que el porcentaje de los recicladores haya incrementado al 100% y presione ok cada ocasión.
If the percentage is less than 100% either in RECYCLER 3,4,5,6, the crystals should be maintained with a damp flannel with 5% alcohol or Qiutip and having the unit already armed and ready, in the software must select the Module Maintenance Done option 4 times in case it comes out low in the 4 Recyclers 3,4,5,6, now select Module Get Maintenance Info again, 4 times Recyclers 3,4,5,6 this it is to verify that the percentage of recyclers has increased to 100% and press ok each time.
Ejemplo: porcentaje bajo en el RECYCLER 6 (85%)
Example: low percentage in RECYCLER 6 (85%)

Nota: al darle mantenimiento al reciclador y selecciona la opción (Module Set Maintenance Done) y vuelve a checar en (Module Get Maintenance Info) resetea a 0 los ciclos y el porcentaje de los sensores incrementa.
Note: when giving maintenance to the recycler and select the option (Module Set Maintenance Done) and check again in (Module Get Maintenance Info) it resets the cycles to 0 and the percentage of the sensors increases.
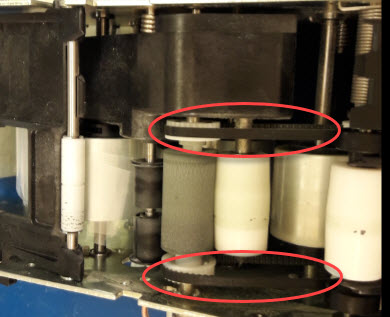
NOTA: A todas las unidades que sean revisión 10 deberán de reemplazar al 100% los rodillos verdes antiguos por los rodillos nuevos PN: 969996001P1 / ROLLER MAINT KIT y deberá de actualizarla.
NOTE: All units that are revision 10 must replace 100% the old green rollers with the new ones PN: 969996001P1 / ROLLER MAINT KIT and must update it.
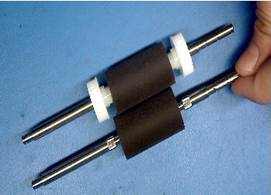
Cintas rotas o demasiado dañadas deben ser reemplazadas, para la revisión 10 y revisión 11 son iguales.
Broken or too damaged tapes must be replaced, for revision 10 and revision 11 are the same.
Revisiones 11 o más recientes, dar mantenimiento y limpieza normal en los cristales y rodillos con una franela de microfibra humedecida con alcohol isopropílico al 5%
Revisions 11 or newer, maintain and clean crystals and rollers normally with a microfiber flannel moistened with 5% isopropyl alcohol.
Rodillos Nuevos; revisión 10.
New Rollers; revision 10.
|
|
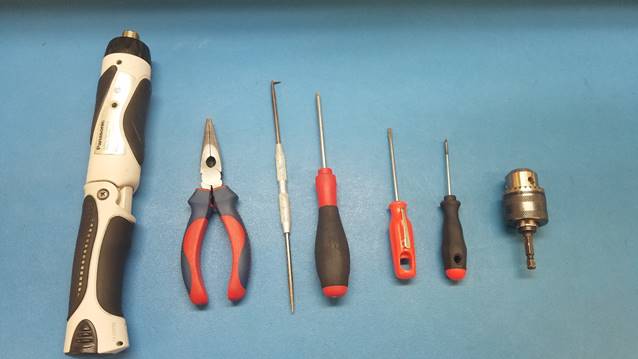
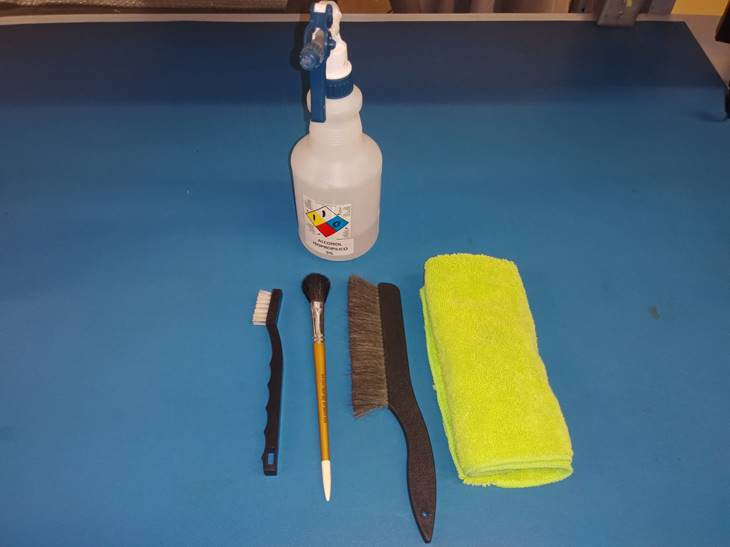
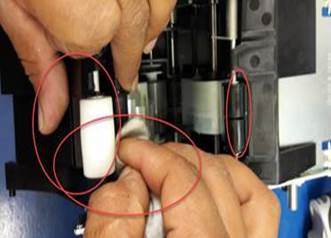
Herramientas necesarias para mantenimiento o reparación de Reciclador.
Tools needed for maintenance or repair of Recycler.
· Desarmador Electrico Panasonic
· Panasonic Electric Screwdriver
· Pinzas de punta.
· Pointed tweezers.
· Punta
· Peak
· Desarmador torx 10 y 6.
· 10 and 6 torx screwdriver.
· Desarmador plano chico
· Small flat screwdriver
· Chuck drill
· Chuck drill
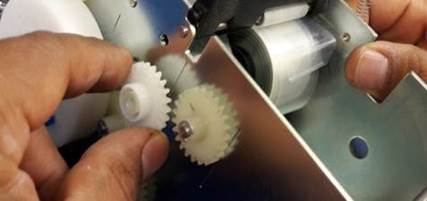
COMO DESARMAR EL RECICLADOR / HOW TO DISASSEMBLE THE RECYCLER
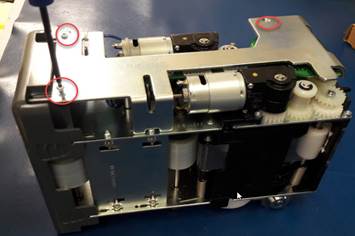
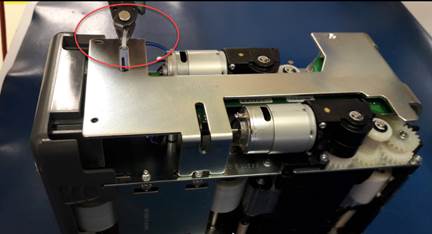
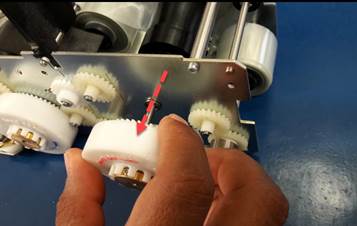
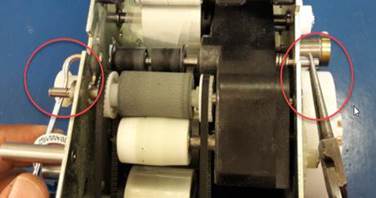
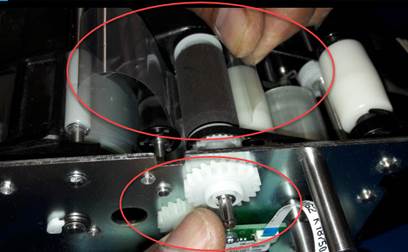
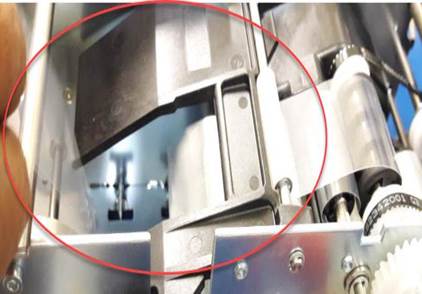
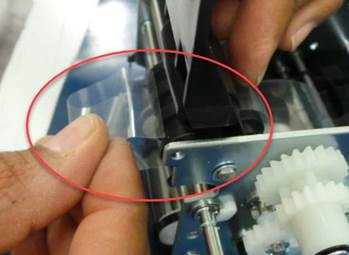
Retire los 3 tornillos, corte la corbata y remueva la parte metálica.
Remove the 3 screws, cut the tie and remove the metal part.
|
|
|
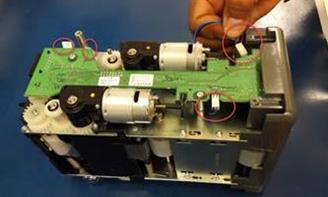
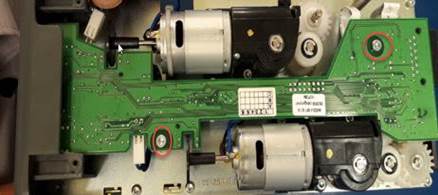
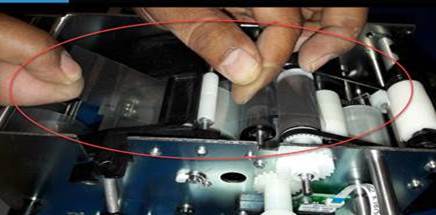
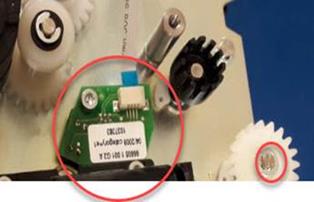
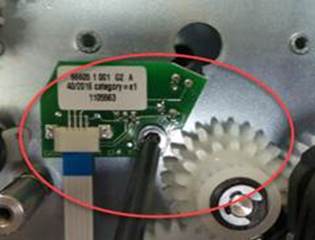
Desconecte los cables flat, los cables de los motores, quite los 2 tornillos de la tablilla y retírela.
Disconnect the flat cables, the motor cables, remove the 2 screws from the board and remove it.
|
|
|
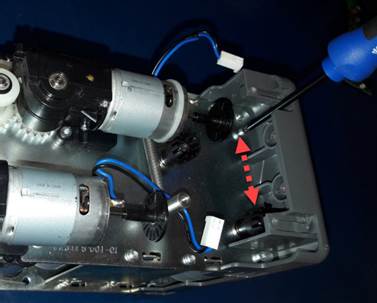
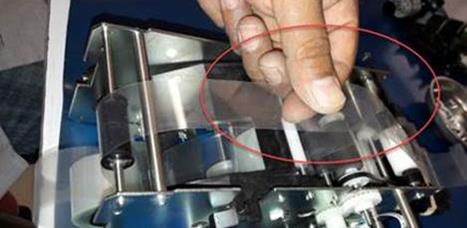
Para retirar el gabinete frontal, quite los 4 tornillos (2 de cada lado).
To remove the front cabinet, remove the 4 screws (2 on each side).
|
|
|
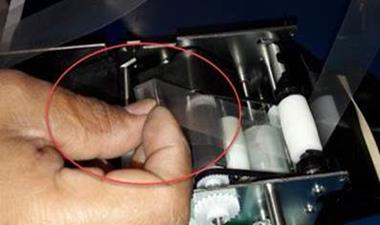
Quite los 4 tornillos para retirar la cubierta negra de la parte posterior del reciclador.
Remove the 4 screws to remove the black cover from the back of the recycler.
|
|
|
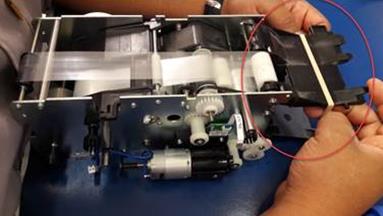
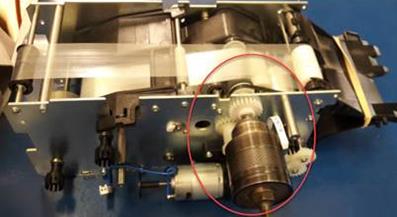
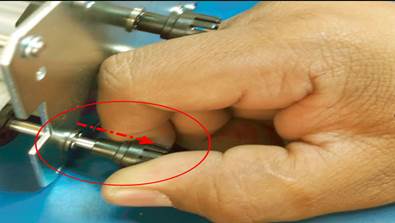
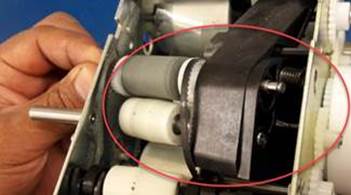
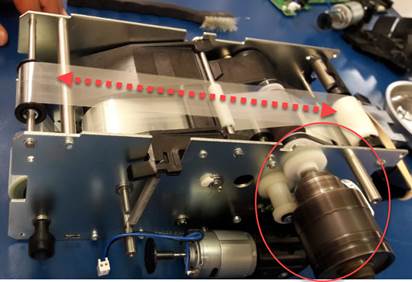
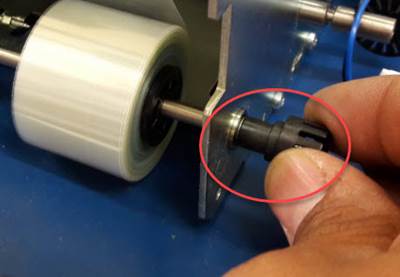
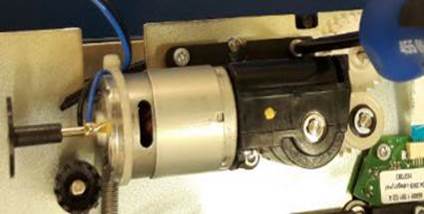
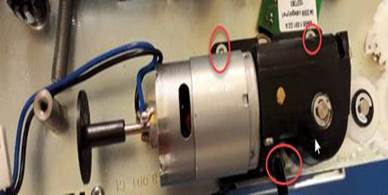
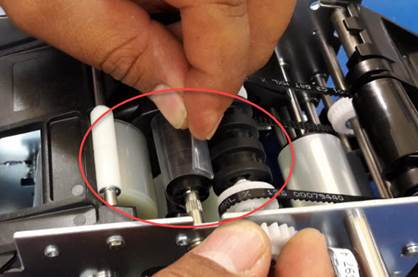
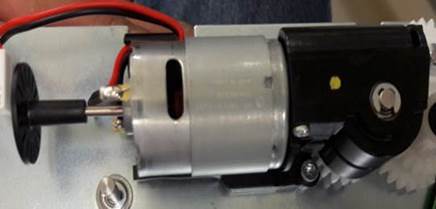
Quite los 3 tornillos para retirar el motor.
Remove the 3 screws to remove the motor.
|
|
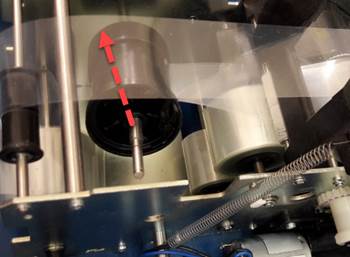
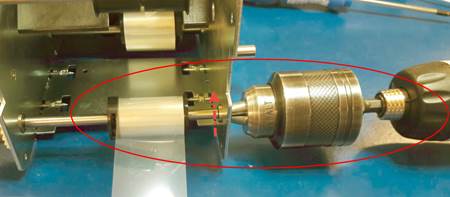
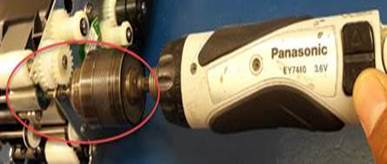
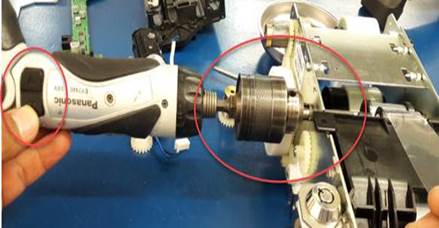
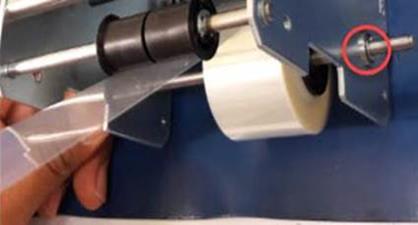
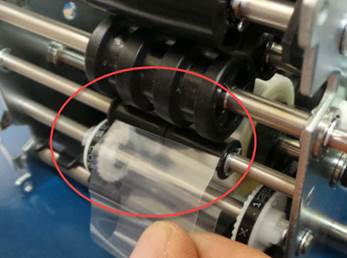
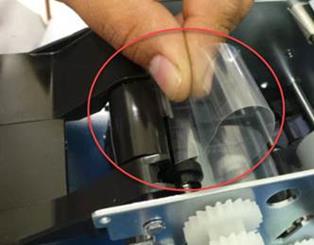
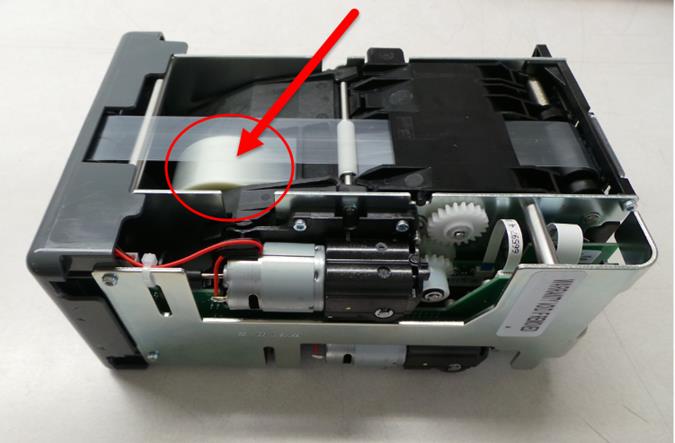
Levante las cubiertas y sosténgalas con ligas para facilitar el mantenimiento. Coloque el desarmador eléctrico con el maneral para embobinar la cinta hacia la derecha, hasta el final de la cinta.
Raise the covers and hold them with garters for easy maintenance. Position the electric screwdriver with the handle to wind the tape to the right, to the end of the tape.
|
|
|
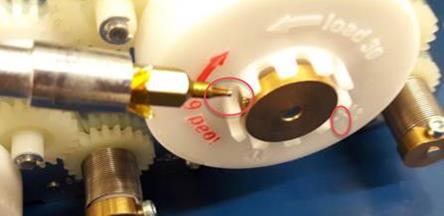
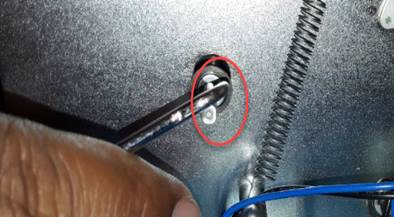
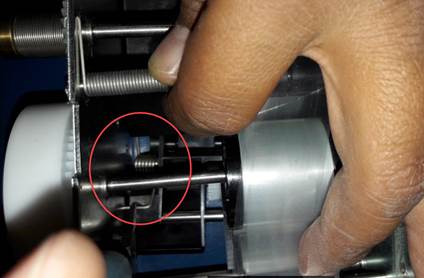
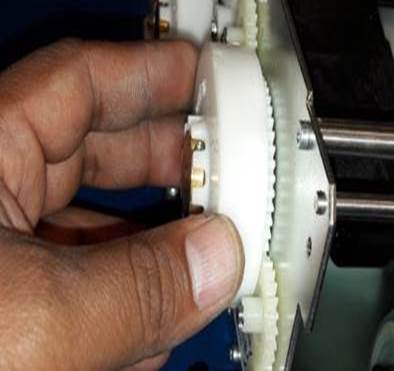
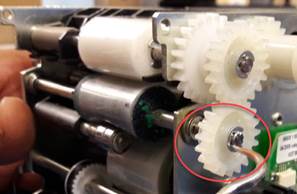
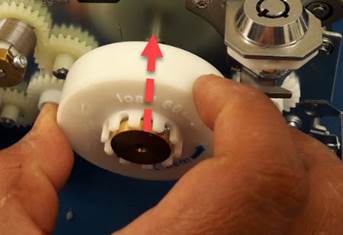
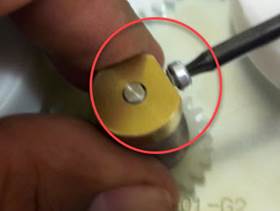
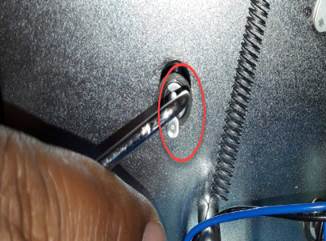
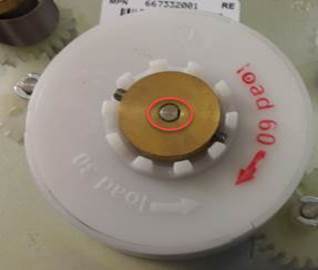
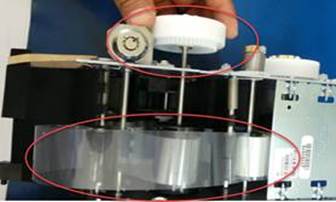
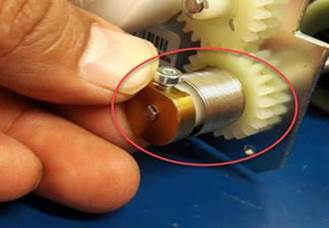
Afloje los 2 tornillos del Load 60.
Loosen the 2 screws on Load 60.
|
|
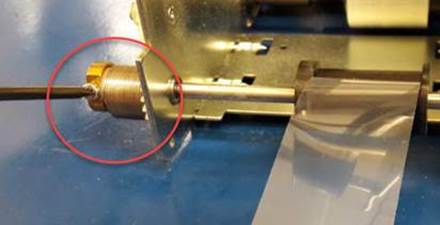
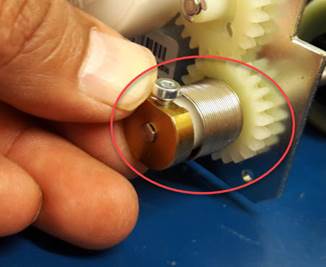
Afloje el tornillo del resorte para quitar la tensión de la cinta y a continuación retire el Load 60.
Loosen the spring screw to remove tension on the belt, and then remove Load 60.
|
|
|
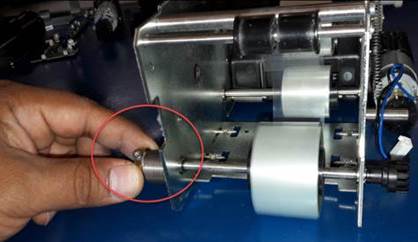
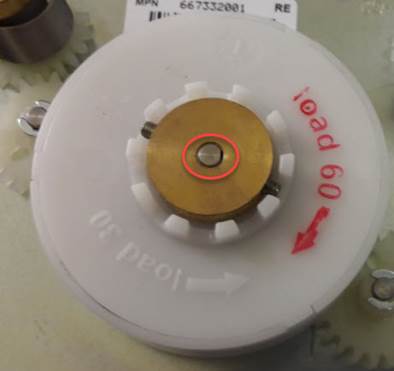
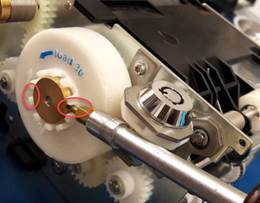
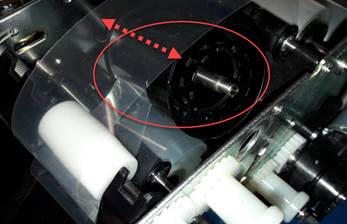
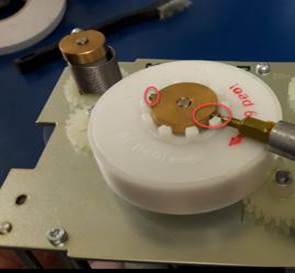
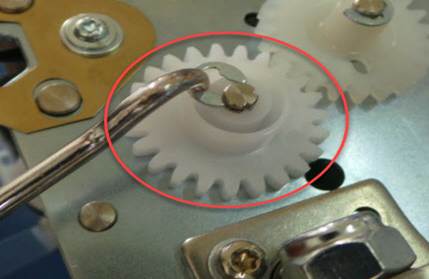
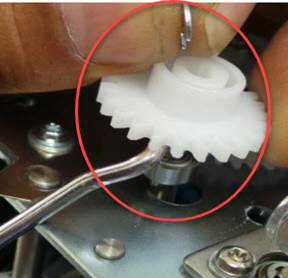
Quite contador o polea, como se muestra en la imagen y retire el seguro del perno.
Remove counter or pulley, as shown in the picture, and remove the bolt lock.
|
|
|
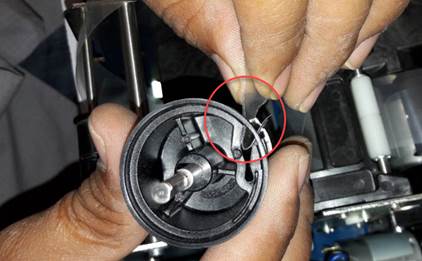
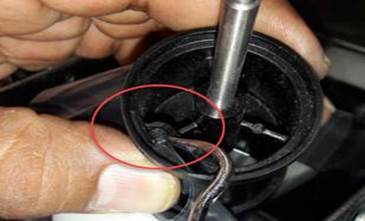
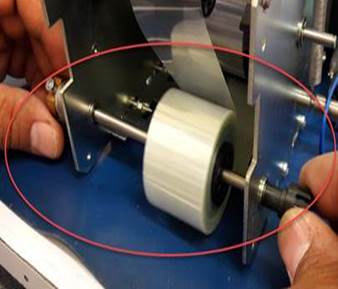
Saque el tambor y retire el seguro del mismo para poder liberar la cinta.
Pull out the drum and remove the latch from the drum to release the tape.
|
|
|
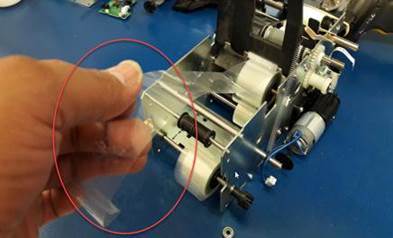
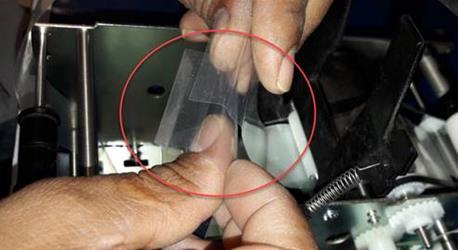
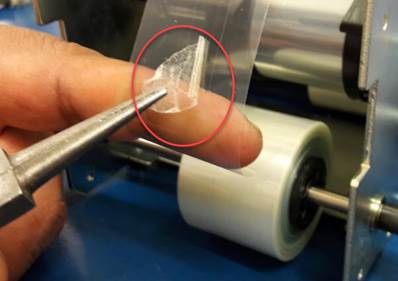
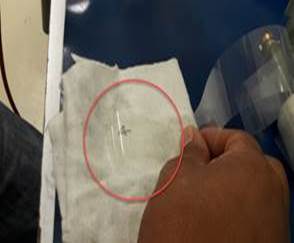
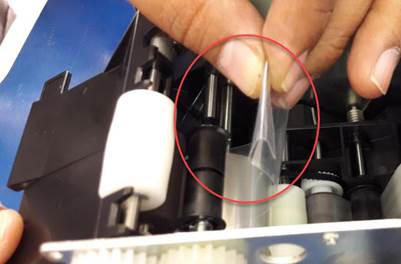
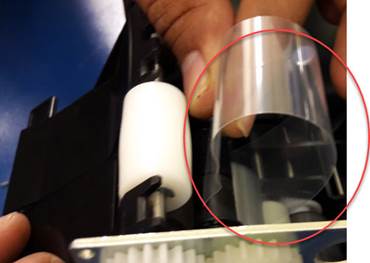
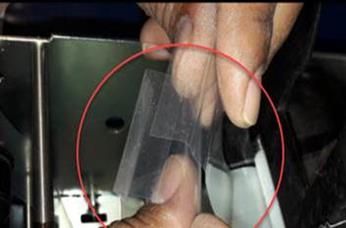
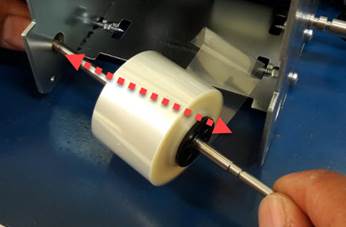
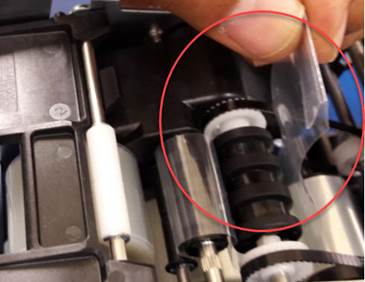
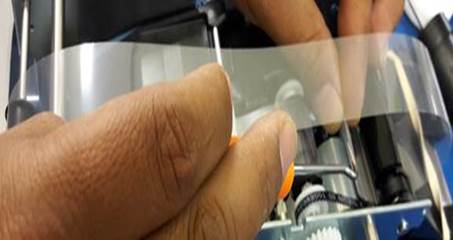
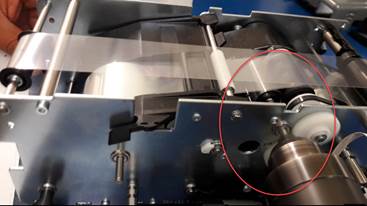
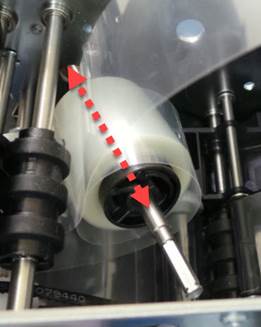
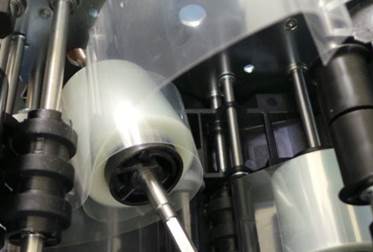
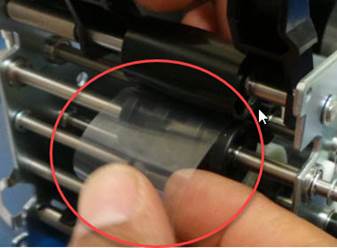
Haga una marca en la cinta Mylar para identificar el lado que desea limpiar por primero, ya que debe realizar la limpieza por ambos lados.
Make a mark on the Mylar tape to identify the side you want to clean first as you need to clean both sides.
|
|

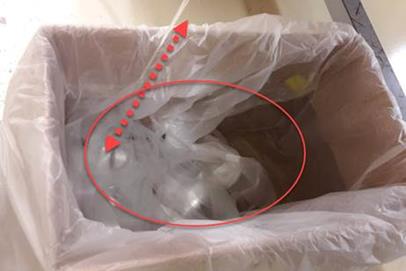
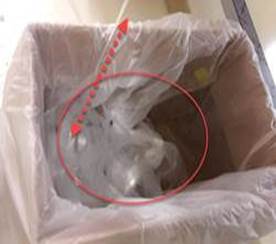
Colocar una caja con bolsa para que la cinta que está siendo limpiada vaya cayendo dentro y no se llene de pelusas o suciedad del piso.
Place a box with a bag so that the tape being cleaned falls inside and does not get lint or dirt from the floor.
|
|

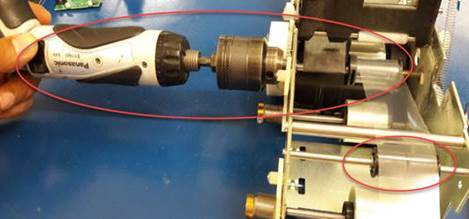
Coloque el desarmador eléctrico y embobine la cinta guiándolo con el rodillo superior.
Insert the electric screwdriver and rewind the tape guiding it with the top roller.
|
|
|
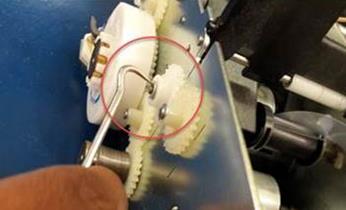
Coloque tape doble en la cinta para que no se suelte y vuelva a colocar el engrane con el resorte.
Place double tape on the tape so that it does not come loose and replace the gear with the spring.
|
|
|

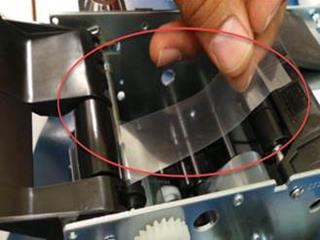
Saque el otro extremo de la cinta, marque y realice limpieza de los dos lados como se menciona previamente.
Pull out the other end of the tape, mark and clean both sides as previously mentioned.
|
|
|
|
|
|

Retire el seguro y remueva del engrane del lado izquierdo, coloque el desarmador eléctrico embobine la cinta utilizando el rodillo como guía para alinear.
Remove the latch and remove from the gear on the left side, insert the electric screwdriver wind the tape using the roller as a guide to align.
|
|
|
Coloque cinta doble para que no se suelte la cinta y vuelva a colocar el engrane.
Place double tape so that the tape does not come loose and replace the gear.
|
|
|
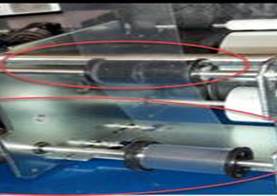
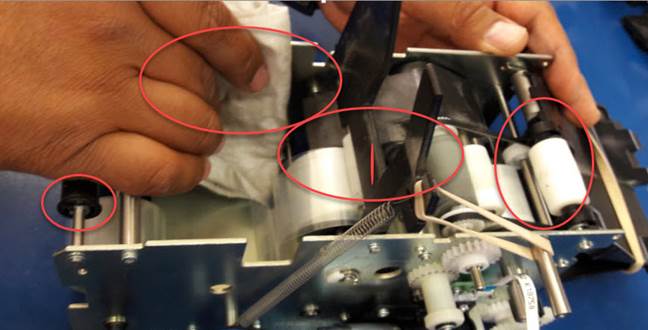
Realice limpieza interna y en todas las partes del reciclador, rodillos, cubiertas, etc.
Perform internal cleaning and on all parts of the recycler, rollers, covers, etc.
|
|
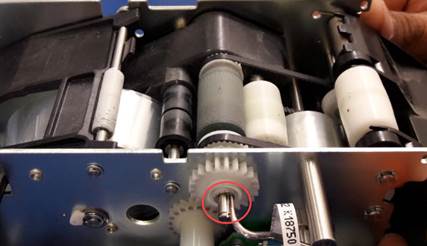
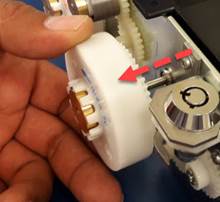
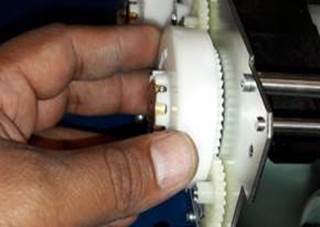
Remover seguros del engrane y del perno.
Remove bolt and gear locks.
|
|
|
Remueva seguros del rodillo negro superior y retire el perno.
Remove the upper black roller locks and remove the bolt.
|
|
|
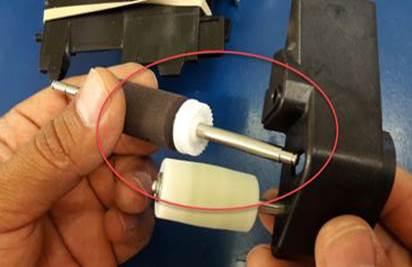
Remueva los baleros del perno, retire el rodillo viejo de la unidad y realice limpieza de cada parte que sea removida, así como las paredes metálicas del reciclador.
Remove the bearing from the bolt, remove the old roller from the unit and clean each part that is removed, as well as the metal walls of the recycler.
|
|
|

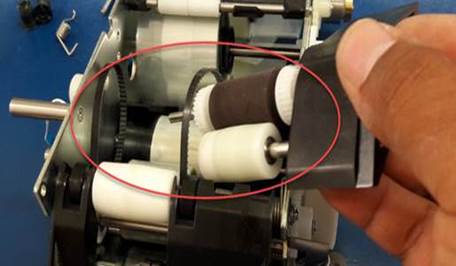
Verifique que las bandas se encuentren en buenas condiciones.
Verify that the bands are in good condition.
|
|
Coloque el rodillo nuevo introduciéndolo por en medio de las bandas, alinee las bandas y arme de la misma manera que desarmo. No olvide colocar de manera correcta el resorte.
Place the new roller by inserting it through the bands, align the bands and assemble in the same way that it was disassemble. Do not forget to correctly position the spring.
|
|
|
|
|
|
Alinee la cinta guiándola en su posición original, introduzca la cinta por debajo del rodillo nuevo girando a la derecha y guiar por debajo del rodillo blanco.
Align the tape guiding it in its original position, insert the tape under the new roller by turning clockwise and guide under the white roller.
|
|
|
|
|
|

Alinee el otro extremo y guie por arriba del rodillo negro, introduzca por la parte inferior del rodillo trasero y pase por debajo del rodillo blanco de en medio hasta juntar los dos extremos.
Align the other end and guide over the black roller, feed through the bottom of the rear roller, and pass under the middle white roller until the two ends meet.
|
|
|
|
|
|
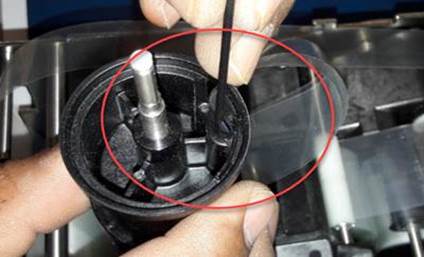
Introduzca los dos extremos bien alineados en el cilindro y coloque seguro del tambor.
Insert the two well-aligned ends into the cylinder and securely snap on the drum.
|
|
|
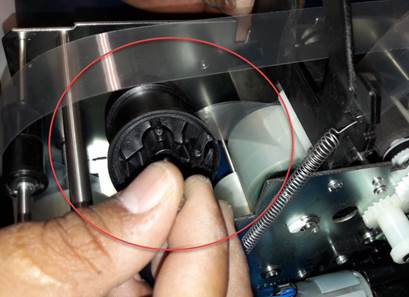
Coloque el tambor en su posición original y arme de la misma manera con todas sus partes como fue desarmado.
Place the drum in its original position and assemble in the same way with all its parts as it was disassembled.
|
|
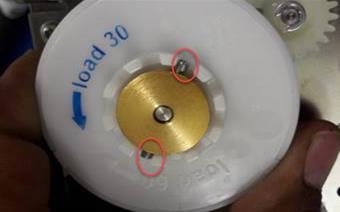
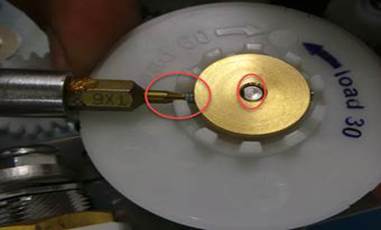
Coloque la carga del ajustador # 60 sin apretar los opresores, gire hacia atrás hasta que la cinta con el perno de la cinta esté completamente tensada, liberando la tensión, coloque y alinee el perno donde va la carga del ajustador # 60 para que quede el lado plano del perno y ajuste los dos opresores.
Place adjuster load # 60 without tightening the oppressors turn backwards until the tape with the tape bolt is fully tensioned, releasing the tension, place and align the bolt where the adjuster load # 60 goes so that the flat side of the bolt remains and adjust the two oppressors.
|
|
|
|
|
|

De tres vueltas al engrane con el resorte y coloque correctamente el perno alineando al lado plano del perno y apriete el tornillo.
Turn the engraving three times with the spring and correctly position the bolt aligning to the flat side of the bolt and tighten the screw.
|
|
|

Localice el tape doble que puso anteriormente en la cinta y retírelos. Realice limpieza para quitar el pegamento de la cinta.
Locate the double tape you put on the tape earlier and remove them. Clean to remove the glue from the tape.
|
|
Recorra la cinta con el desarmador eléctrico para verificar que haya quedado bien alineada, regrese la polea negra y coloque el motor.
Go through the belt with the electric screwdriver to verify that it is well aligned, return the black pulley and install the motor.
|
|
|
|
|
|
Verifique que haya quedado bien armado y que la cinta este bien alineada.
Verify that it has been well assembled and that the tape is well aligned.
|
|
Retire el motor quitando los 3 tornillos, posterior remueva los seguros, coloque el desarmador eléctrico y embobine las cintas individualmente.
Remove the motor by removing the 3 screws, then remove the latches, insert the electric screwdriver and wind the tapes individually.
|
|
|
|
|
|
Remueva el ajustador load #30 afloje los opresores sin quitarlos, remover la tablilla chica.
Remove the adjuster load # 30 loosen the oppressors without removing them, remove the small board.
|
|
|
|
Sacar el tambor retirando el seguro para poder quitar la cinta.
Remove the drum by removing the latch in order to remove the tape.
|
|
|
|
|
|
Artículos requeridos para realizar limpieza general.
Items required to perform general cleaning.
· Alcohol isopropílico al 5%
· 5% isopropyl alcohol
· Cepillo antiestático
· Antistatic bristle brush
· Brochas antiestáticas
· Antistatic brushes
· Franela de Microfibra
· Microfiber Flannel
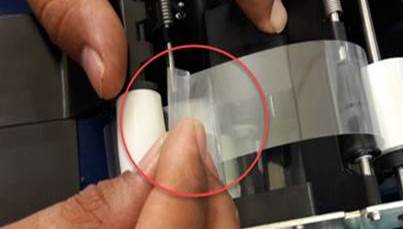
Realice la limpieza de la cinta como anteriormente se menciona, no olvide marcar la cinta para poder limpiarla por ambos lados.
Clean the tape as mentioned above, be sure to mark the tape so that it can be cleaned on both sides.
|
|
|
Retire engrane y resorte aflojando el tornillo, coloque desarmador y embobine por el rodillo blanco para alinear la cinta, coloque tape doble en la cinta de manera que no se suelte.
Remove gear and spring by loosening screw, insert screwdriver and wind through white roller to align tape, double tape on tape so it does not come loose.
|
|
|
|
|
|

Retire el rodillo viejo quitando los seguros y balero, no olvide realizar limpieza a cada parte que sea quitada.
Remove the old roller by removing the locks and bearing, do not forget to clean each part that is removed.
|
|
|
|

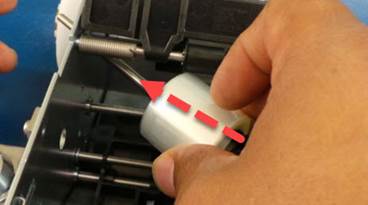
Quite el seguro que trae el rodillo viejo e instálelo en el nuevo.
Remove the lock that comes with the old roller and install it on the new one.
|
|
|


Coloque el rodillo nuevo y arme de nuevo colocando los seguros.
Attach the new roller and reassemble by placing the latches.
|
|
Agarre el extremo de la cinta guie por debajo del rodillo nuevo, introduzca por en medio de los rodillos.
Grasp the end of the guide tape underneath the new roller, insert in between the rollers.
|
|
|
Agarre el otro extremo de la cinta y guíelo por en medio de los rodillos junte los dos extremos, colóquelos en el tambor asegurando que este bien alineado y coloque el seguro.
Grab the other end of the tape and guide it through the rollers, bring the two ends together, place them on the drum ensuring that it is properly aligned, and put the safety on.
|
|
|
|
|
|

Reinstale el tambor bajando bandera, no olvide colocar todos los seguros y baleros de la manera correcta.
Reinstall the drum by lowering the flag, be sure to fit all latches and bearings in the correct manner.
|
|

Coloque el ajustador load#30 y gire hasta que tense sin apretar los opresores.
Set the load # 30 adjuster and rotate until it loosely tightens the oppressors.
|
|
|
Coloque el perno de manera que quede el lado plano del lado del opresor.
Position the bolt so that the flat side is on the side of the oppressor.
|
|
|
Localice la cinta adhesiva doble, retírela y limpie la cinta.
Locate the double adhesive tape, remove it and clean the tape.
|
|
Reinstale el engrane con resorte, de 3 o 4 vueltas para tensar y apriete el tornillo verificando que haya quedado bien del lado plano.
Reinstall the spring-loaded gear, do 3-4 turns to tension and tighten the screw, checking that it is well on the flat side.
|
|

Coloque el desarmador eléctrico y gire la cinta de un lado a otro verificando que haya quedado bien alineado. Reinstale todas las piezas que fueron necesarias para su reparación de la misma manera que fueron removidas. Realice limpieza externa y pruebe en la cama de prueba.
Put on the electric screwdriver and rotate the tape from one side to the other, checking that it is well aligned. Reinstall all parts that were necessary for your repair in the same way that they were removed. Perform external cleaning and test on the test bed.
|
|
Revisar si los cristales de los sensores de la cubierta trasera están dañados o sucios (S BNR, RE, REAR BEZEL ASSY) si están quebrados, reemplace.
Check for broken or damaged rear cover sensor crystals (S BNR, RE, REAR BEZEL ASSY) if broken, replace.
|
|
COMO REEMPLAZAR LA CINTA MYLAR / HOW TO REPLACE MYLAR TAPE
Con la unidad desarmada coloque en diagonal el perno con la cinta, coloque los baleros y seguros.
With the unit disassembled, place the bolt diagonally with the tape, install the bearings and locks.
|
|
|
Coloque el engrane con el resorte.
Place the gear with the spring.
|
|
Inserte en forma diagonal de derecha a izquierda, coloque los baleros y cierre el seguro blanco.
Insert diagonally from right to left, insert bearings and close white latch.
|
|
|

Guie la cinta pasándola por la parte trasera del primer rodillo, pasando la cinta por encima del segundo rodillo de en medio guiando por debajo del tercer rodillo, pasándolo por debajo del rodillo blanco.
Guide the tape through the back of the first roll, running the tape over the middle second roll, guiding under the third roll, and passing under the white roll.
|
|
|
|
|
|
Agarre el otro extremo de la cinta guíelo por encima, pasándolo por el rodillo posterior y encima de la otra cinta.
Grasp the other end of the tape and guide it over the top, past the rear roller, and over the other tape.
|
|
|
Una los 2 extremos de la cinta, colóquela en el tambor y coloque el seguro. Coloque baleros y seguros.
Join the 2 ends of the tape, put it on the drum and put the safety. Put bearings and locks.
|
|
|
|


Coloque el ajustador load #60 sin ajustar los opresores para poder ajustar la cinta gire y tensione una vez ajustada apriete los opresores.
Set the adjuster load # 60 without adjusting the fasteners to be able to adjust the belt turn and tension once adjusted tighten the fasteners.
|
|
|
|
|
|

Ajuste el engrane y el resorte para darle tensión a la cinta, de 3 o 4 vueltas girando hacia la izquierda.
Adjust the gear and spring to tension the belt, 3-4 turns by turning counterclockwise.
|
|
|

Coloque el desarmador y hágalo girar de un lado a otro. Verifique que este bien alineada y coloque el motor.
Put the screwdriver in and turn it from side to side. Verify that it is properly aligned and install the motor.
|
|
|
Retire la tablilla, quite el seguro del perno de las bandas y empuje hacia la izquierda y hacia arriba.
Remove the board, unlatch the strap bolt, and push left and up.
|
|
|

Retire seguros y engrane.
Remove latches and gear.
|
|
|
Retire el tambor.
Remove the drum.
|
|
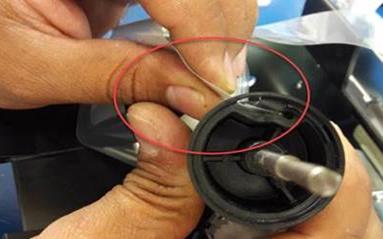
Coloque el perno con la cinta nueva colocando todos los seguros y engranes como fue desarmado y alinee el perno de las bandas.
Place the bolt with the new tape placing all the locks and gears as disassembled and align the bolt of the bands.
|
|
|

Coloque y guie la cinta por el rodillo delgado, guie hacia dentro por en medio de los 2 rodillos y estire la cinta.
Place and guide the tape through the thin roller, guide in through the middle of the 2 rollers and stretch the tape.
|
|
|
|
|
|
|
|
Coloque el segundo perno insertando hacia adentro del lado izquierdo y luego hacia el lado derecho. Coloque los seguros y engrane con el resorte.
Install the second bolt by inserting inward from the left side and then into the right side. Set the latches and engage the spring.
|
|
|

Junte los 2 extremos de la cinta, coloque en el perno o tambor doblando la punta de la cinta y coloque seguro.
Bring the 2 ends of the tape together, place on the bolt or drum by bending the end of the tape and place securely.
|
|

Meta el tambor bajando la guía plástica negra y coloque el ajustador load #30 hasta tensar la cinta girándolo apriete los opresores ajuste el engrane con el resorte dándole 3 o 4 vueltas y apriete el tornillo.
Insert the drum by lowering the black plastic guide and place the adjuster load # 30 until the belt is tightened by turning it, tighten the oppressors, adjust the gear with the spring turning it 3 or 4 times and tighten the screw.
|
|
|
|
|
|
Arme por completo la unidad y pruebe en la cama de prueba verificando que funcione correctamente.
Fully assemble the unit and test on the test bed verifying that it works properly.
|
|
Fallas Comunes / Common Failures
|
Velocidad del motor de transporte demasiado baja Transport motor speed to low
Motor de transporte no arranca Transport motor not started
|
Solución si es revisión 10 reemplace los rodillos verdes por el kit nuevo o la cinta mylar. Solution if revision 10 replace green rollers with new kit or mylar tape.
Solución si es revisión 11 la falla es en la tablilla realice la reparación o el reemplazo de la misma o en los motores. Solution if it is revision 11 the fault is in the board make the repair or the replacement of the same or in the motors.
|
Antes de comunicarse con el personal de calidad debe tener la unidad actualizada y lista en la cama de prueba.
Before contacting quality personnel, you should have the unit up to date and ready on the test bed.
PRUEBA FINAL DE CALIDAD / FINAL QUALITY TEST.
INSERCIÓN DE TODOS LOS DE BILLETES.
INSERTION OF ALL BILLS.
Mientras realice la prueba debe revisar que la unidad:
While performing the test, you must check that the unit:
-No realice ruidos extraños
-Do not make strange noises
-No atasque los billetes
-Do not jam the bills
-Revisar que la cantidad de los billetes que dispensa la unidad sea la correcta (la cantidad que se está solicitando).
-Check that the amount of the bills dispensed by the unit is correct (the amount that is being requested).
Ingrese los billetes como se indica a continuación:
Enter the banknotes as indicated below:
5 billetes de 20 dólares
5 of 20 dlls
5 billetes de 10 dólares
5 of 10 dlls
5 billetes de 5 dólares
5 of 5 dlls
10 billetes de 1 dólar
10 of 1 dll
1 billete de 100 dólares
1 of 100 dlls
1 billete de 50 dólares
1 of 50 dlls
Siga las siguientes instrucciones:
Follow the instructions below:
1- En la pestaña Monitor MEI BNR – In the Monitor MEI BNR tab
2- Seleccione Open Device – Select Open Device
3- Seleccione Bill Handling – Select Bill Handling
4- Seleccione Cash In Start – Select Cash In Start
5- Seleccione Cash In – Select Cash In
6- Ubique MDU, escriba el número 0 – Locate MDU, write number 0
7- Presione OK – Press OK
|
|
La unidad está preparada, los LEDs encenderán en color verde para aceptar billetes. Los billetes de 100 y 50 dólares se irán directamente a la caja de efectivo.
The unit is ready, the LEDs will light green to accept bills. The 100- and 50-dollar bills will go directly to the cash-box.
|
|
Al insertar los billetes, el programa aparecerá de la siguiente manera:
When you insert the banknotes, the program will appear as follows:
|
|
Ubique en el lateral izquierdo del programa la opción:
Locate on the left side of the program the option:
1- Cancel
2- Cash In End
|
|
PRUEBA / TEST
DISPENSAR – DISPNSE 75 DLLS
En esta prueba entregara:
5 veces 15 dólares = 75 dólares
In this test it will deliver:
5 times 15 Dollars = 75 Dollars
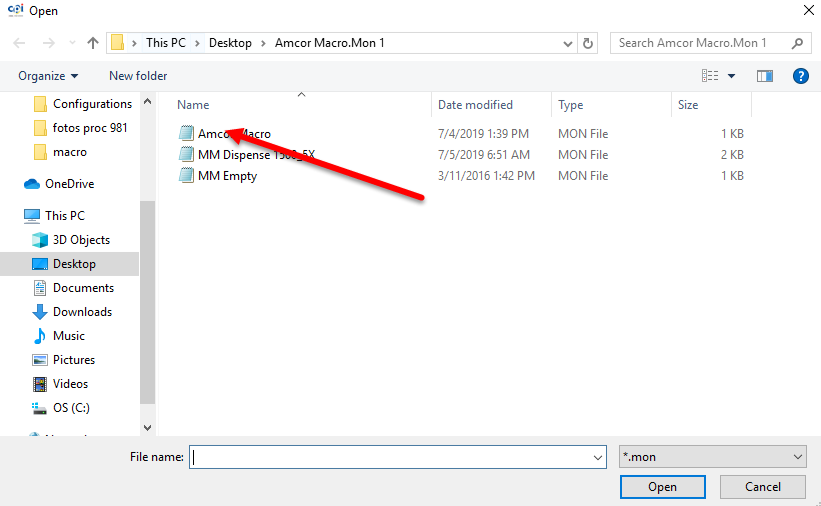
Seleccione el icono del folder.
Select the folder icon.
|
|

Abrirá la siguiente ventana de la cual seleccionará MM Dispense 1500_5x
It will open the next tab from you will select MM Dispense 1500_5x
Después seleccionar OPEN.
Then select OPEN.
|
|
Ahora seleccione Play. Le entregara 75 dólares como se explica al inicio de la prueba.
Now select Play. It will give you 75 dollars as explained at the beginning of the test.
|
|

Entrega de billetes.
Banknotes delivery.
|
|

Debe ingresar nuevamente los billetes de la siguiente manera:
You must enter the bills again, as follows:
Como almacenar los billetes.
How to store the bills.
1 - Seleccione Cash In Start
1 - Select Cash In Start
2 - Seleccione Cash In
2 - Select Cash In
3 - Marque la cantidad 0
3 - Select quantity 0
4 - Seleccione OK
4 - Select OK
Introduzca los billetes en el cabezal.
Insert the bills into the main module.
|
|
|
Cuando termine de ingresar los billetes, seleccione la siguiente opción:
When you finish entering the bills, select the following option:
1. Cancel
2. Cash In End
|
|
DISPENSAR – DISPENSE 185 DLLS
En esta prueba entregara en:
In this test it delivers:
5 de 20 dólares (5 of 20 Dollars)
5 de 10 dólares (5 of 10 Dollars)
4 de 5 dólares (4 of 5 Dollars)
Después - Then
10 de 1 dólar (10 of 1 Dollar)
4 de 5 dólares (4 of 5 Dollars)
TOTAL: 185 dólares (185 Dollars)
Seleccione la carpeta amarilla.
Select the yellow folder.
|
|

1. Seleccione – Select Amcor Macro
2. Seleccione – Select Open
|
|
Ahora seleccione Play. Le entregara 185 dólares como se explica al inicio de la prueba.
Select Play. It will give you 185 dollars as explained at the beginning of the test.
|
|
|
|

Como almacenar los billetes.
How to store the bills.
1 - Seleccione Cash In Start
1 - Select Cash In Start
2 - Seleccione Cash In
2 - Select Cash In
3 - Marque la cantidad 0
3 - Select quantity 0
4 - Seleccione OK
4 - Select OK
Introduzca los billetes en el cabezal.
Insert the bills into the main module.
|
|

Después de haber realizado las pruebas, debe enviar los billetes a la caja de efectivo como a continuación:
After having finished all the tests, you must send the banknotes to the cash-box as below:
Al terminar de insertar todos los billetes seleccione la opción:
When you finish inserting all the bills select the option:
1- Cancel
2- Cash In End
|
|

Seleccione la carpeta amarilla.
Select yellow folder.
|
|

1.Seleccione MM Empty
1. Select MM Empty
2. Seleccione Open
2. Select Open
|
|
Seleccione Play para enviar los billetes a la caja de efectivo, al término de esta operación deberá sacar la caja de efectivo, retirar los billetes y contarlos para asegurarse que la cantidad corresponda a la de la prueba.
Select Play to send the bills to the cash-box, after that you must take out the cash-box, withdraw the bills and count the them to make sure that the amount corresponds to that of the test.
|
|

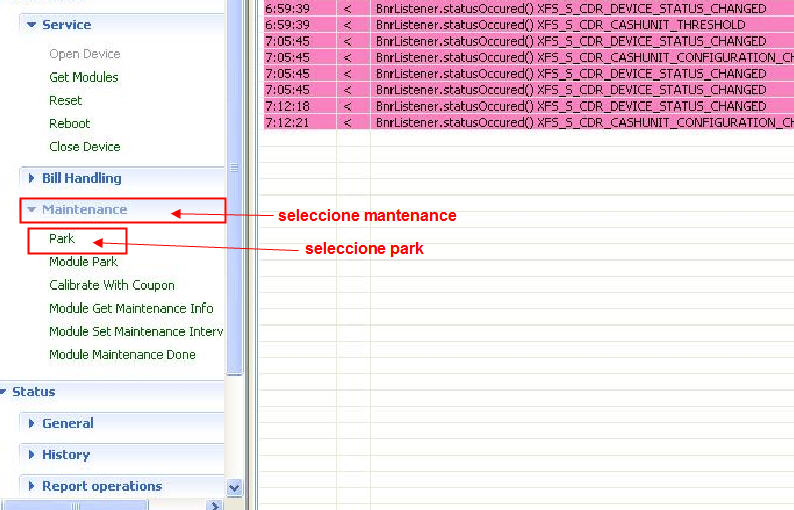
Al término de la prueba debe poner el reciclador en modo Park.
At the end of the test you must put the recycler in Park mode.
La unidad empezará a recorrer la cinta Mylar.
The unit will start looping through the Mylar tape.
|
|
Al término retire la caja de efectivo, saque los billetes y retire el reciclador de la cama de prueba.
Upon completion remove the cash-box, take out the bills and remove the recycler from the test bed.
|
Abra la llave retire la caja de efectivo Open the key remove the cash box |
Gire la llave y abra caja de efectivo Turn the key and open cash box |
Retire el dinero de la caja Remove the banknotes from the box |
|
|
|
|
|
Retire Loader Remove Loader |
Gire la llave Turn the key |
Retire reciclador Remove recycler |
|
|
|
|

Asegurarse que el reciclador se haya puesto en modo Park.
Make sure the recycler has been put into Park mode.
|
|
Al terminar de probar la unidad el personal de calidad se lleva la unidad a su estación de trabajo, pará el siguiente proceso.
At the end of testing the unit, the quality personnel take the unit to their work station, for the following process.
|
|
WI#: 1056 BNR Recycler |
Originator/ Originador: B Perez 2/21/13 |
||||
|
Rev/ Revisión: 12 |
Rev Date/ Fecha de Revisión: 4/28/22 |
Name/ Nombre: A Rojas |
Update/ Actualización: Revisión
|
Next Review/ Próxima Revisión: NA |
Approval/ Aprobado por: Tom St John |
|
|
13 |
4/28/22 |
D Casas |
Translation/ Traducción |
NA |
Tom St John |
|